Bob423 How To: Aqua Map with a big screen monitor
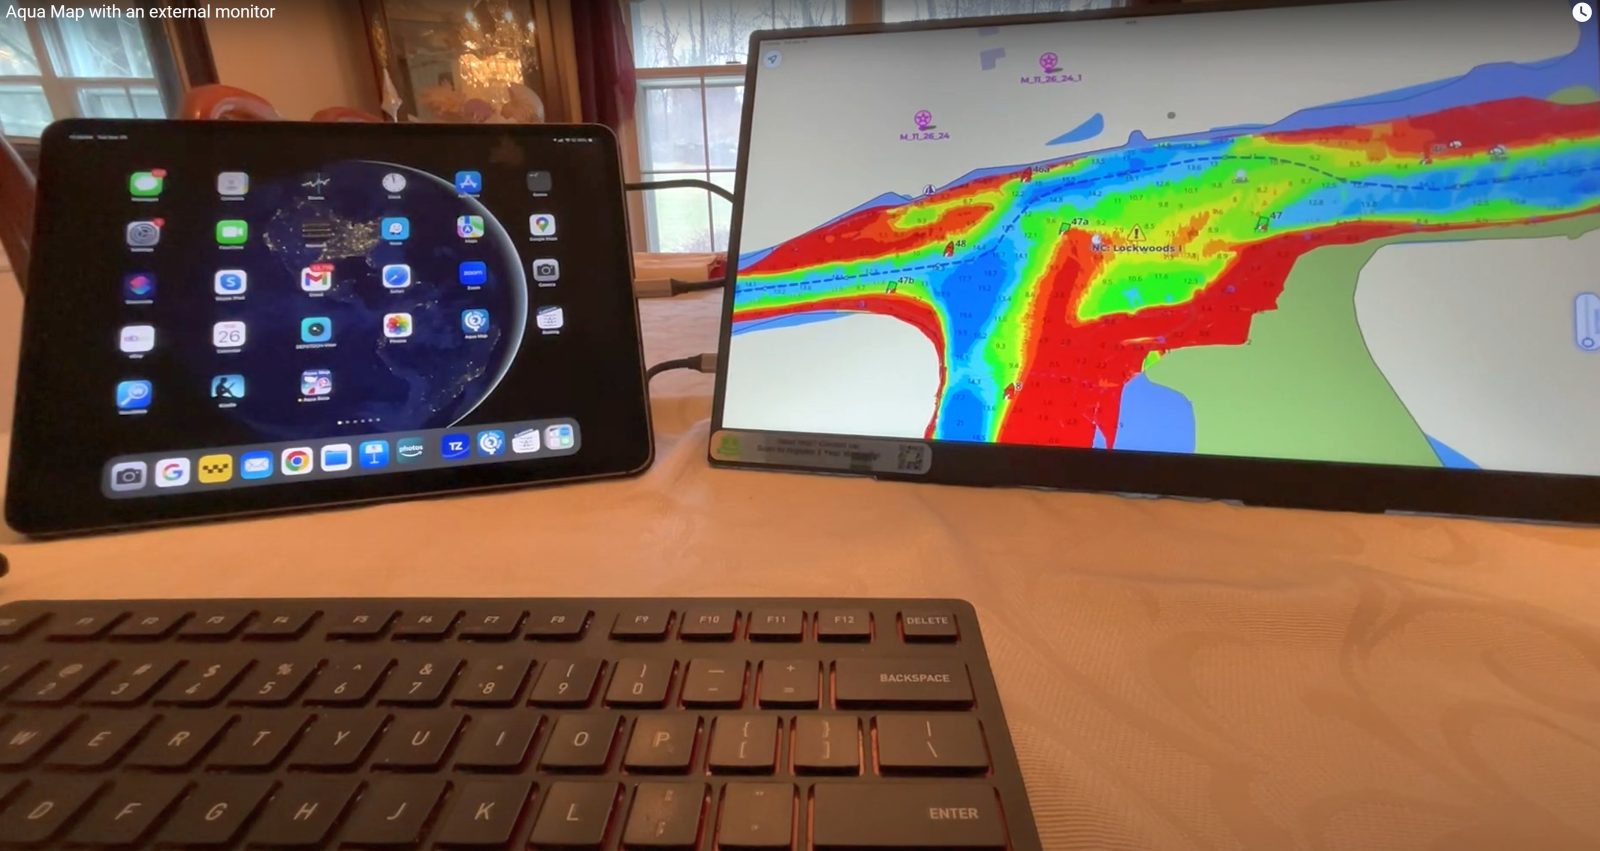
Robert Sherer (aka Bob423) has been helping fellow East Coast cruisers for many years — especially with specific advice about transiting the ICW and getting the most out of the nav app Aqua Map — and Panbo is pleased to publish his technique for using a large second display with an iPad:
I do all my route planning on my iPad Pro 12.9, but some find the small screen limiting and turn to a PC program on their laptop or home computer for a larger view when planning a trip. If you have an iPad with an M1 to M4 chip, you can display your iPad screen on a monitor you probably already have for your PC, perhaps a 27-inch size. I use my portable 18.5-inch monitor when on my boat. The larger size is a big improvement in screen real estate. Note that the typical PC monitor screen ratio is 16:9 vs the iPad’s 4:3. It’s much wider, and Apple’s Stage Manager allows iPad apps to use the entire width of the screen.
What’s required
The Aqua Map team has done their homework, so the view on the larger monitor is not just a screen mirror of the iPad; it fills the HD screen from edge to edge, showing more of a chart than what’s visible on the iPad at the same zoom level. What’s required are three items:
- A cable to connect the iPad to the monitor. If your monitor has a USB-C input, then it’s just a USB-C cable made for transferring data, not just a USB-C charging cable. The iPad Pro with the M1 chip or higher has a Gen 3 USB-C port with 40 Gbps capability and will support a 4k monitor. The recommended cable is rated at 10 Gbps and will also support a 4k monitor and, of course, the usual HDMI resolution of 1080 x 1920. If your monitor does not have a USB-C input port, then you’ll need a USB-C to HDMI cable or an adapter such as the Apple USB-C Digital AV Adapter or the Acer USB-C Hub.
- A Bluetooth keyboard. The one I have is switchable between my PC and iPad and has a good typing feel.
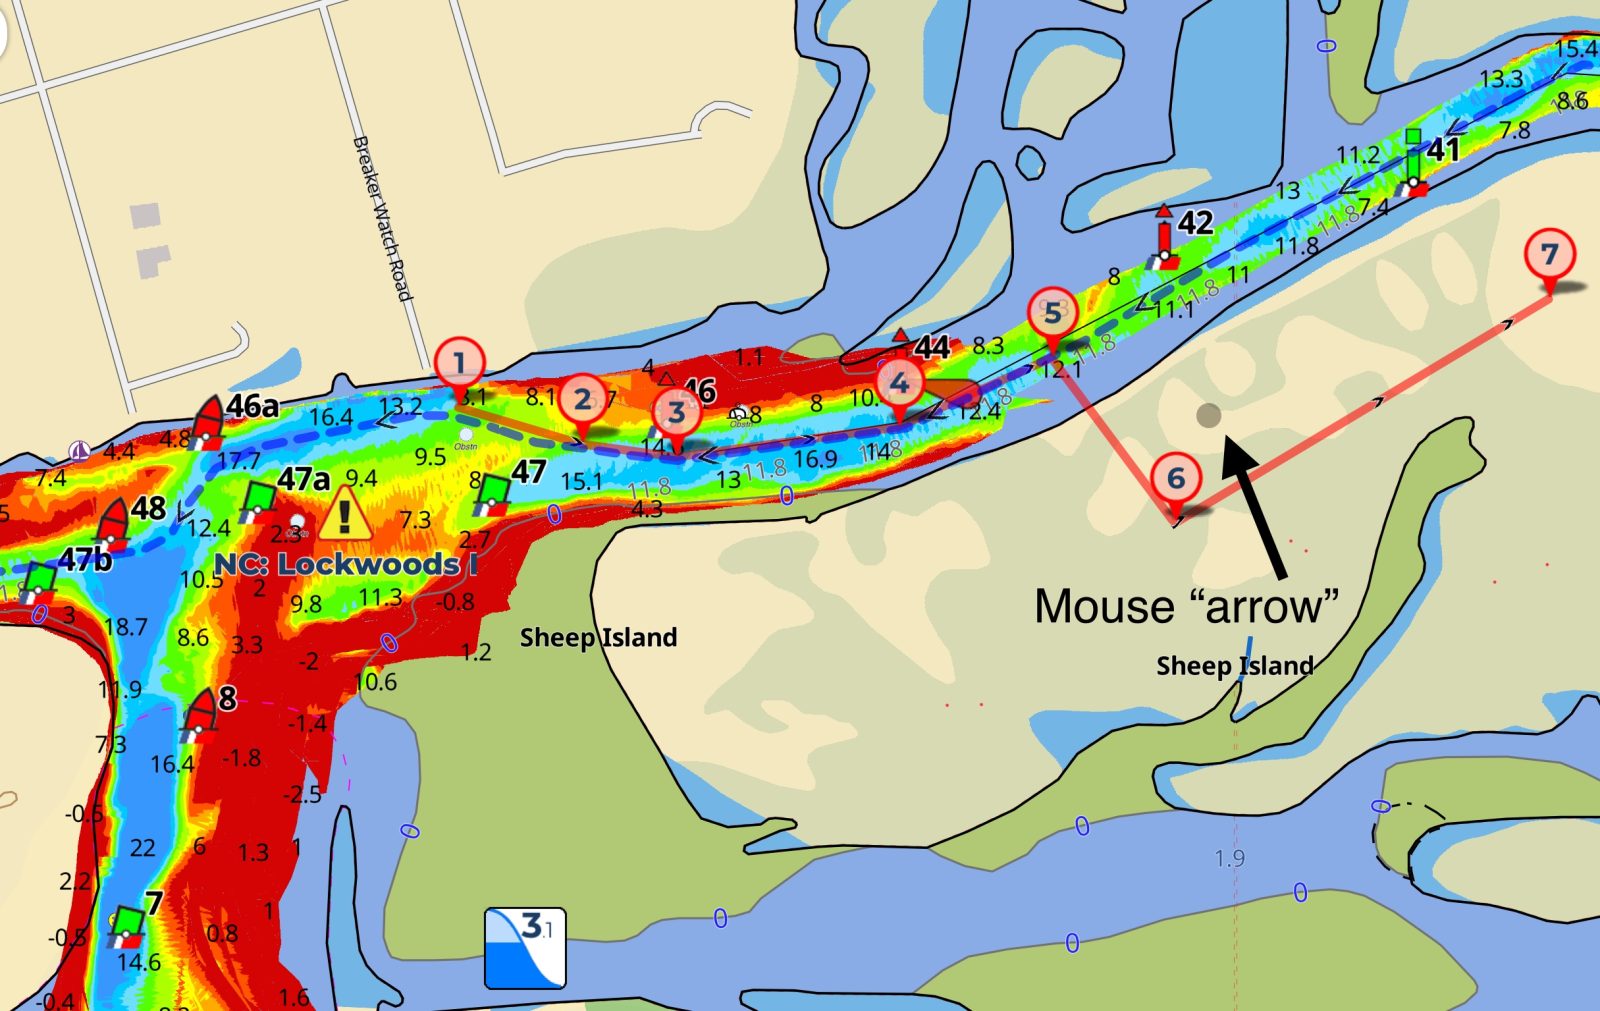
- A Bluetooth mouse, also switchable between my PC and iPad. The grey dot is the iPad version of the mouse pointer.
- A monitor: I use an 18.5-inch Vision Owl portable monitor with a standard HDMI resolution of 1080 x 1920. The monitor has three inputs:
– One HDMI input with cable
– Two Gen 1 USB-C full-featured inputs with two cables and a power supply. Both USB-C inputs can transfer data and power. If one port is used to power the monitor, the other port can receive the HDMI signal and provide power to the iPad Pro. Alternatively, the iPad Pro can power the monitor using its internal battery for several hours connected with just one USB-C cable. The Vision Owl comes with a padded sleeve and a zippered pocket for secure carrying between home and boat.
Okay, let’s start.
Connect a Bluetooth keyboard and mouse to the iPad to use an exterior monitor. The two I recommend work well with the iPad, but any Bluetooth device should be fine:
- Follow the instructions for your devices to put them in Bluetooth pairing mode.
- Tap on Settings on the iPad, and then Bluetooth.
- Ensure Bluetooth is turned on, and look for the names of the devices you want to pair and give them a tap.
- Depending on the device, you may be asked to enter a number displayed on the screen.
You only have to do this once. After that, the recommended keyboard and mouse automatically connect when the iPad and devices are turned on. The keyboard I use is not attached to the iPad, a setup I much prefer. It allows me to move my keyboard to the best typing position without fiddling with the iPad, which I usually have mounted in a holder; it’s also much cheaper than the Apple keyboard. When used with the iPad, you have more screen area to display navigation since the screen area is not covered with the on-screen keyboard, but it’s required for use with the external monitor, as is the mouse.
The power of Aqua Map teamed with an iPad may surprise some users of older programs. No other app or program offers all the features in one app that you get with Aqua Map which include:
- US Corps of Engineers (USACE) surveys, see the example in the photo above – handy in shallow water.
- Waterway Guide and Active Captain POI’s
- NOAA charts automatically updated weekly
- ATONs updated daily from a Coast Guard digital database
- Bob423 tracks can be displayed with a Settings choice, updated automatically
- Marine forecasts of wind, waves, currents, wind gusts, sea surface temperatures and more displayed on the chart
- Online satellite images can be faded so underlying chart features can be seen
- User tracks can be uploaded to NOAA Crowdsourced Bathymetry database automatically (and downloaded) for use in updating NOAA charts.
- Route Planning function for auto display of ETAs to bridges, anchorages, marinas, etc.
- Explorer Charts for the Bahamas in both raster and digital format.
- Tides and currents
A larger display can be useful with such a feature list, so let’s get started.
To start using the exterior monitor:
- Connect the iPad and external monitor with the USB-C cable. As mentioned earlier, the USB-C cable must be a data cable, not just a USB-C charging cable.
- Go to Settings on the iPad followed by Multitasking & Gestures to make sure Stage Manager is selected for the external display. If not, tap on the dot below Stage Manager, it will turn blue (see screenshot below).

On the iPad, tap on the Aqua Map icon to display the app. At the top of the Aqua Map screen are three dots; give them a tap. You will see a window pop up with the selections in the screenshots below. Tap on “Move to Display” and Aqua Map will now display on the external monitor. On the external monitor, you will also see three dots at the top of the display. Use your mouse to move the “dot” — as shown in the Aqua Map screenshot above and click on “Enter Full Screen” if the display is not already in full screen. The Aqua Map display should look like the photo at the top of this article.


Some older monitors may not have all the protocols that Apple needs to allow full-screen operation, in which case you will still have a larger screen but just a mirror of the iPad. Everything I’m describing in this article will still work, but the full width of the screen is not used. The recommended monitor and most recent monitors work in full screen mode.
Not all navigation apps work in full-screen mode. Aqua Map does, of course, but Navionics (now Garmin Boating) does not: the full width of the external monitor is not utilized. Likewise for TZiBoat from Nobeltec and some other navigation apps. Note that the native Apple apps, Microsoft Office apps, Google Docs, Facebook, Windy, Ventusky, RadarScope, Zoom, and some others all work in full-screen mode. It’s nice to see more of your data when working with a complicated spreadsheet.
Everything should be working now:
At this point in the setup you have Aqua Map displayed on the full width of an HD external monitor:
- Your mouse moves Apple’s version of a mouse pointer (a grey dot), and option selections can be made with a left click.
- You can control all Aqua Map functions with your mouse using the exterior monitor, such as panning, zoom level, choices in Settings, forming routes and waypoints – essentially, anything you could do on your iPad with your finger, you can do with a mouse on the exterior monitor.
- The keyboard can be used to enter route names, and data in My Boat, etc. Anything you could do on the iPad with the on-screen keyboard can now be done with Aqua Map as displayed on the external monitor.
In short, anything you can do on the iPad, you can do on the much larger monitor screen. On my boat, I use the larger screen for writing articles in MS Word and for planning and editing routes in Aqua Map. For larger powerboats, a good use would be to install the 18.5 inch monitor at the helm with the iPad safely tucked away and only connected by a USB-C cable to the monitor. With a USB-C power cable connected to the monitor, the iPad Pro would receive a constant charge. As a safety feature, if there were a power failure, the iPad would take over the supply of power to the monitor automatically so you would not lose navigation ability. Some might prefer a trackball instead of a mouse, which would also work as long as it had Bluetooth capability.
See it in action
To see the use of a monitor in action in full screen mode, see this YouTube video:
But what if you wanted more? Why stop at only 18.5 inches? Will full screen mode also work on a 65-inch LG OLED TV? There are two ways of getting the iPad image to the TV:
- Screen mirroring, which just displays what’s on the iPad to the TV in the same iPad 4:3 format
- Stage Manager, which uses the full width of the 16:9 format.
See the difference in these screenshots.
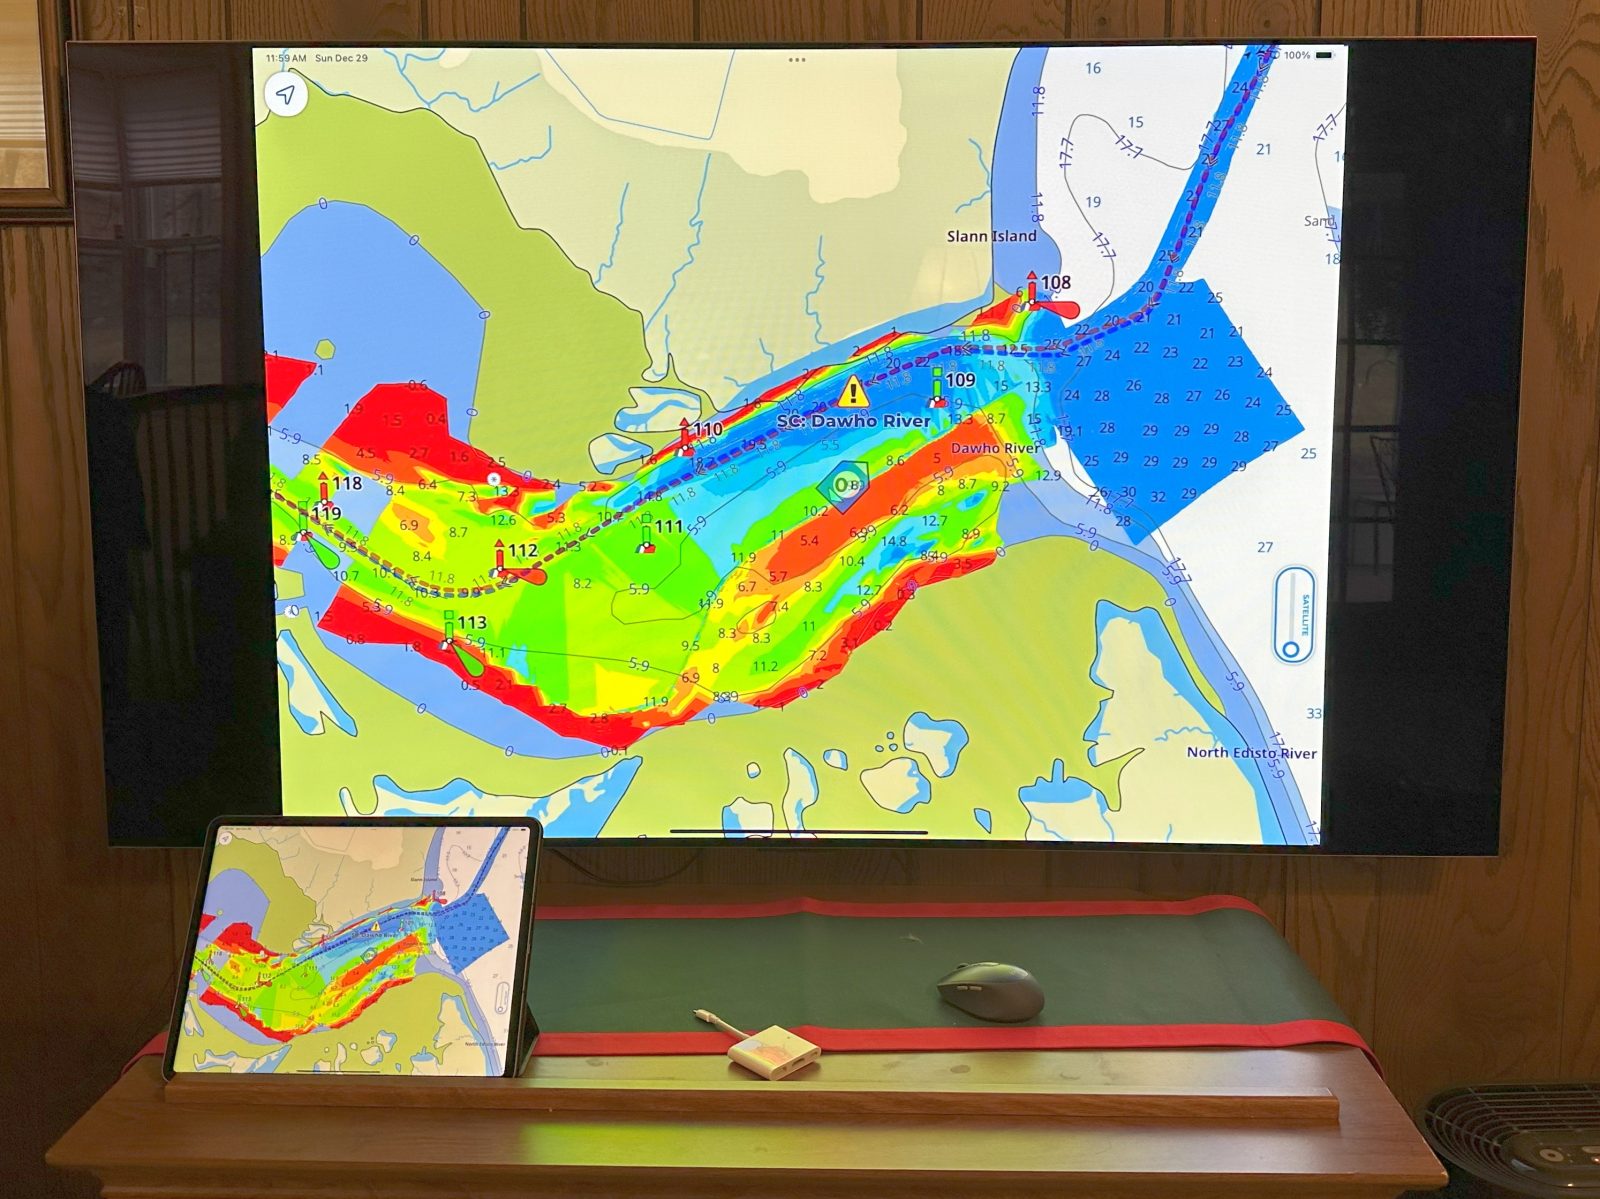
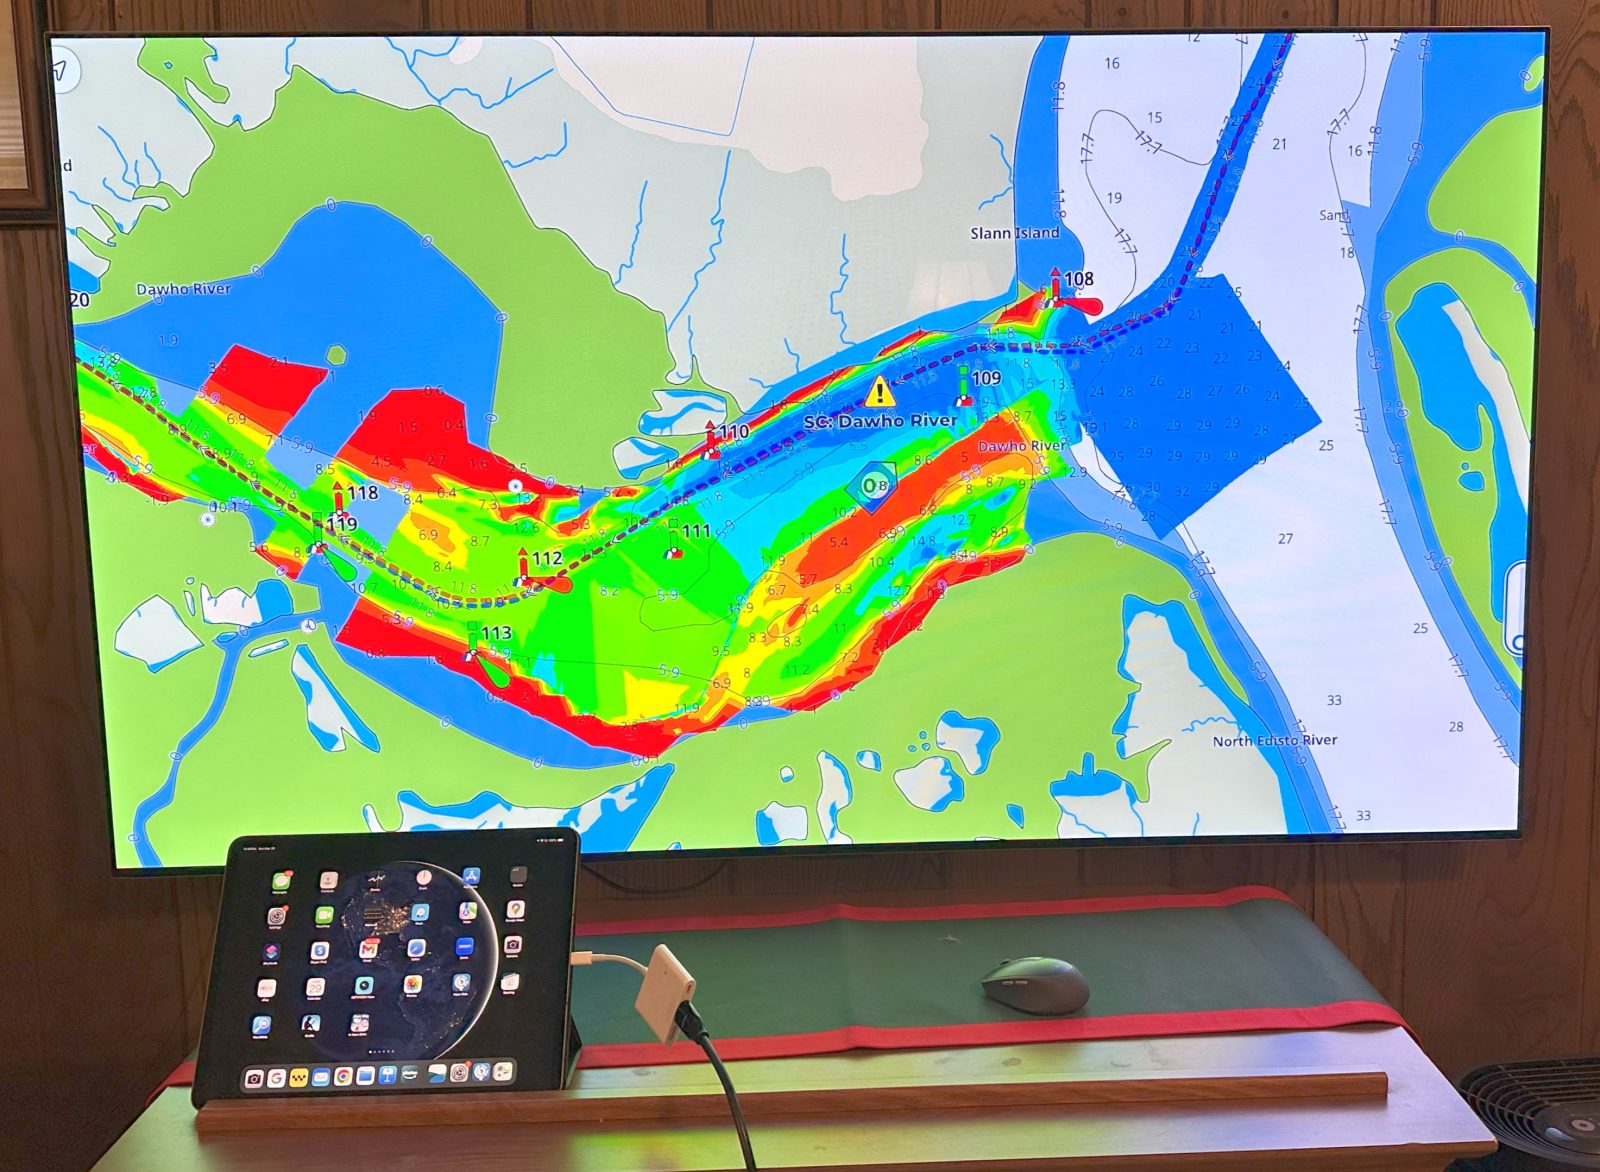
The left is screen mirroring. The right uses Stage Manager with a connection to the HDMI input to the TV.
Which would you rather have at the helm of your powerboat? Well, maybe not 65 inches, but a smaller TV or monitor would be nice. The charts look glorious with the vibrant colors of a large OLED display!
Aqua Map is a powerful program for marine navigation, especially when running on a device more powerful than most PCs such as an iPad Pro with an M1 or later chip with the ability to drive even a 65 inch 4k TV! Use it to its full capability with a larger screen supported by Apple’s Stage Manager. Why use another navigation program on a laptop or even a desktop when you can plan and navigate with a large screen monitor using an iPad you already have?
Robert Sherer annually updates his Bob423 ICW Cruising Guide and related Chartbooks and also actively manages the 20,000+ member ICW Cruising Guide group on Facebook.
***********************************************
PS 1/3/2025: Given reader interest in using their existing MFD screen as a bigger brighter display for Aqua Map (or other apps) running on an iPad, Robert Sherer kindly came up with this list of current MFDs with HDMI inputs:
Garmin GPSMAP 8×10/8×12/8×16 supports HDMI input
Garmin GPSMAP 9000 Series supports dual HDMI input
Moose Marine HDMI IN demo on Garmin 84xx and 86xx
Simrad NSO Evo3S3 16 — 24 advertises HDMI input
Raymarine AXIOM 16 – 24 advertises HDMI input
Furuno TZT16x – TZT24x support HDMI input
Bob423 added that “The easiest way to get HDMI output from an iPad is to use the Acer USB-C Hub which I’ve tested to work with the iPad and HDMI out. It plugs directly into the iPad USB-C port. It will also charge the iPad and has an SD card reader built in and two USB 3.1 Gen1 data ports (standard USB ports).”
None of us have yet tried using an iPad app with any of these MFD HDMI inputs, but that may happen eventually and we’d love to hear about reader experiences in this area ~ Panbo editors




Thanks Guest Writer. Now please show me how to mirror AquaMap on one of my useless $5,000 SIMRAD MFDs?
Unfortunately, only a few premium MFDs have HDMI inputs so you can use their bright waterproof screens with a tablet or PC application, let alone a USB-C display connection. But then again most MFDs have specialized operating systems and connectors so they can process radar, sonar, NMEA 2000, and other marine inputs that are challenging to access with regular consumer electronics.
But that said, I think that there is a way you can use some of what Bob423 shares via Aqua Map on your Simrad screens, by which I mean the many .gpx format routes he shares for free, like these: https://bobicw.blogspot.com/p/bob423-long-tracks.html
Happy New Year to everyone, and how about a big thanks to Robert Sherer for sharing his advanced iPad nav system setup!
And I’m curious if anyone has had success using the Apple Screen Manager Full Screen feature that Aqua Map supports with other nav apps?
I’ll add that some of the same tech the Bob423 uses can applied to a boat’s PC nav system, as seen at Gizmo’s lower helm where a USB-C touch screen can display TZ Navigator including radar and sonar networking from a Furuno TZT2. The software can be controlled by touch or with compact Bluetooth keyboard and mouse (that can also be used with my iPad or laptop):
https://panbo.com/helm-ergonomics-2-gizmos-pilothouse/
I’ve been very happy with the Logitech M720 mouse and backlit K810 keyboard, but the latter has been replaced by the and but they’ve been replaced the MX Mini which sounds even better:
https://eftm.com/2022/01/review-logitech-mx-keys-mini-the-best-compact-keyboard-going-around-221030
Thanks for the tutorial. This is great! I have been doing some of this already, but did not realize that AquaMaps was bigger. I do have a question regarding charging though. Typically when you are doing a run, the battery capacity is not sufficient to run the full time and if you are using the single input on the iPad to connect to the monitor, how do you connect to power? Do you have a suggestion that might address this? Thanks to Robert Sherer as well. When we did our loop, we had his tracks overlaid on our AquaMaps. In fact, we ran one iPad with AquaMaps and Bob423 as an overlay and another with Navionics with our route for the day.
The Acer hub will charge and provide an HDMI output. https://www.amazon.com/gp/product/B0CQSZYWT8/ref=ppx_yo_dt_b_search_asin_title?ie=UTF8&th=1
Can you just use Apple TV to any screen that has hdmi input?