Easy heat-shrink wire labeling with a Brother P-Touch label-maker

I run a lot of wires on my boats and often in a hurry. I used to tell myself that I’d remember what a wire was for and hence didn’t worry about labeling it. Experience — and the sheer quantity of wires I run — has demonstrated that’s not a winning strategy. So, a few months ago I undertook figuring out how to label my wires better. Here’s what I’ve learned.
Over the years I’ve used various strategies for creating wiring labels. I’ve tried the little cloth numbers that go around the wire and then documenting each wire in a spreadsheet. That didn’t work for me because invariably I don’t have the decoding spreadsheet when I needed it. So then I moved on to using my Brother P-Touch label-maker to print cable flags or cable wraps. The flags work okay, but they’re a pain to apply, stick out, and easily get caught and ripped, plus if you loom the cables together, they frequently get stuck in the bundle. I’ve also tried cable wraps from the wider labels and initially believed this was my answer; until I came back a few days later and discovered the label itself had separated from the tight radius of wrapping around the cable.
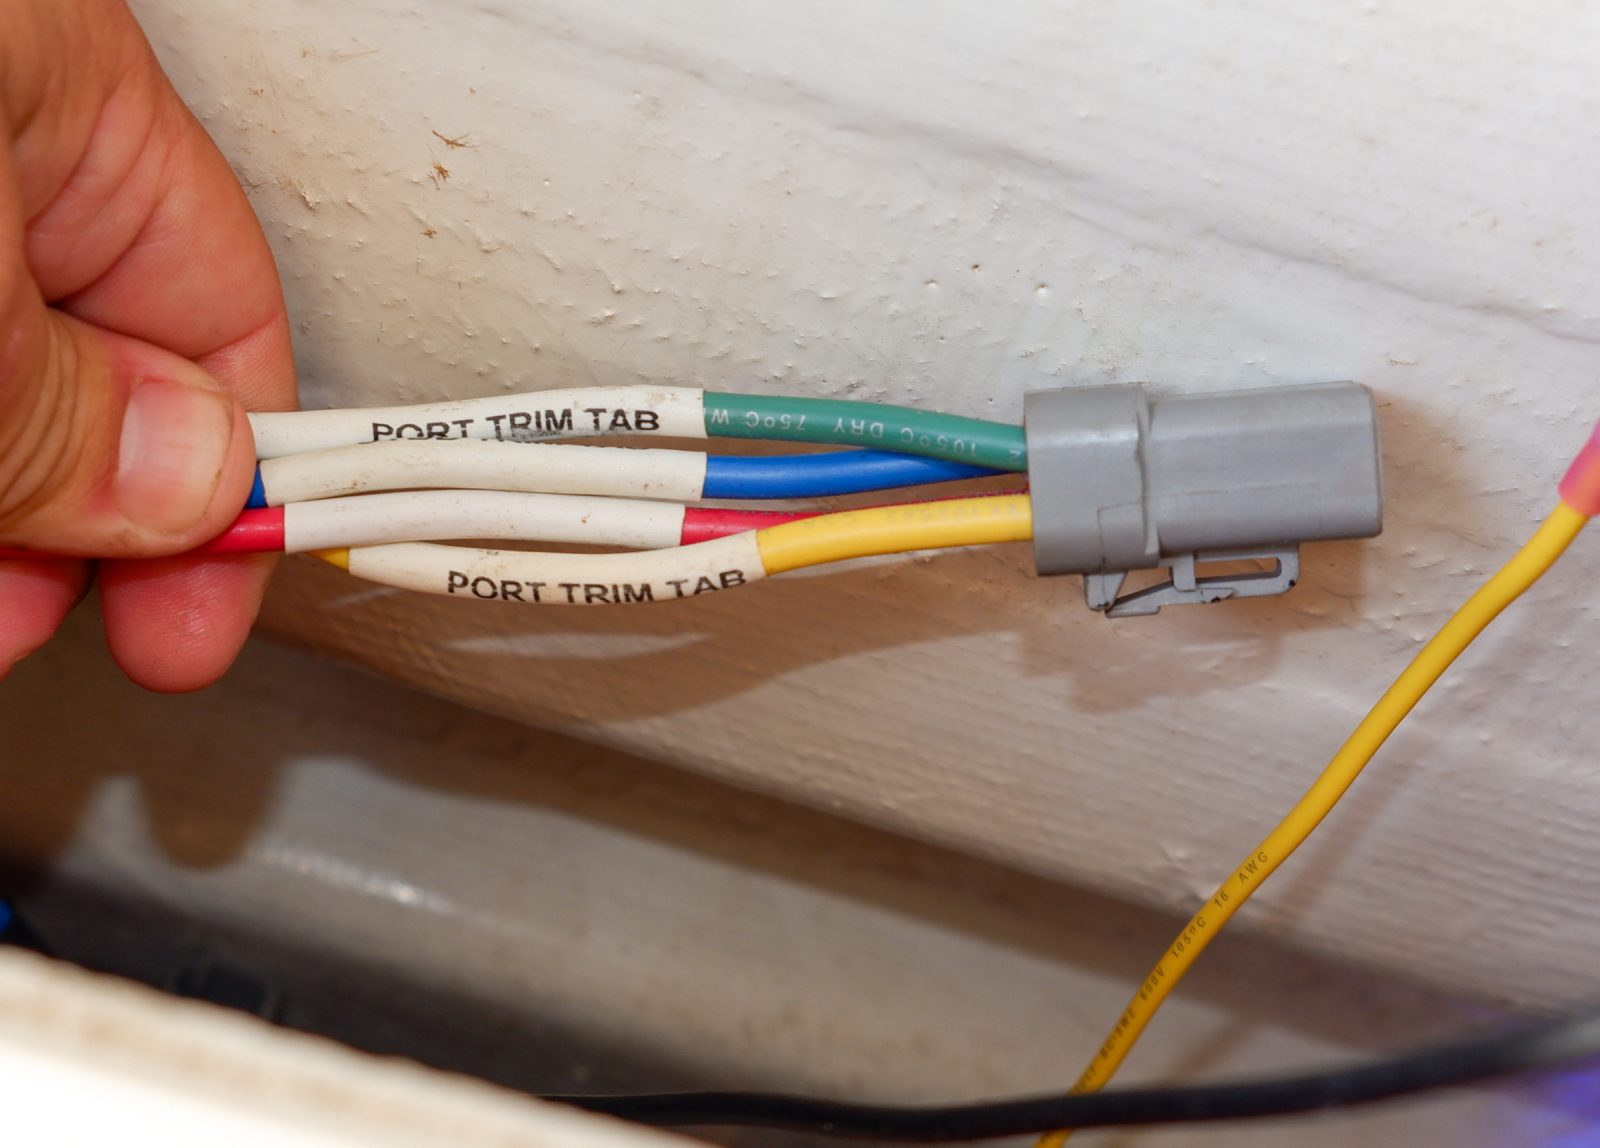
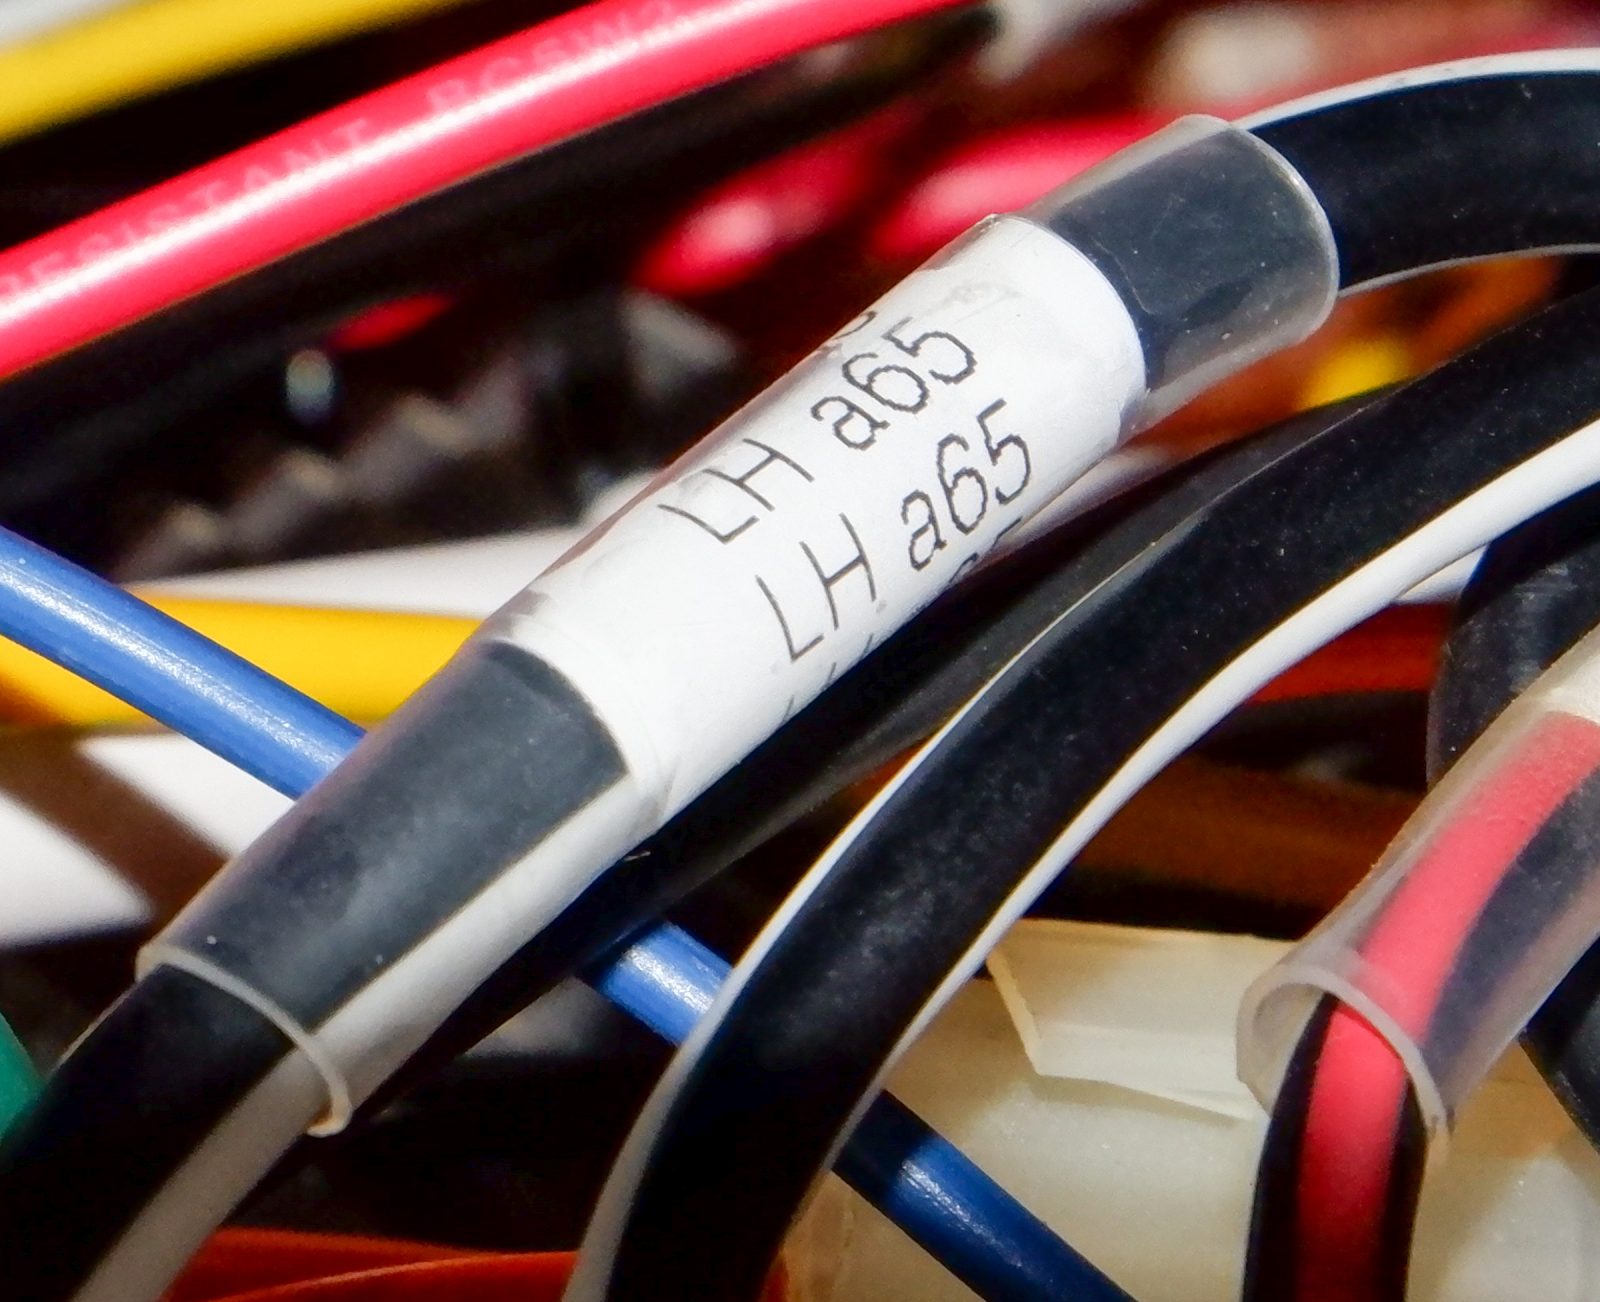
While crawling around the bilges of newer boats I noticed that manufacturers were printing labels on heat-shrink tubing and attaching that to the cables. It looked like the best possible solution and I was intrigued. It turns out Brother has a line of heat-shrink tubing, their HSe cassettes, for just such a purpose. But, further investigation on Brother’s website says that only a few of their commercial label-makers work with the HSe labels, and those units start at about $150.
One day while looking for something else I stumbled on a HackADay post about using HSe heat-shrink tubing cassettes in the less expensive label-makers. I have a Brother PT-D600 that serves me very well and I’m not looking to replace, so I was intrigued. I went to Amazon and quickly found several options for aftermarket heat-shrink cassettes. I’ve had good luck with aftermarket label cassettes so I ordered a few to try. The HackADay article mentions needing to cover a sense hole on the cassette to fool your non-HSe compatible label-maker as well as having to set the print to be mirrored to have it print correctly. I haven’t had to do either of these things, and in fact my PT-D600 recognizes the cassettes as “Special Tape” which changes the defaults for tab cut-length. It seems my model actually supports the HSe tapes despite Brother’s specifications to the contrary.
The process of printing a heat-shrink tube is little different than that of a standard label. The only difference is that instead of peeling the backing and sticking the label on you slide the tube onto its destination and heat it. I’ve noticed that the text printed on the tube can be rubbed off if you handle it much before applying heat. Once it’s been heated the label is pretty durable, though it doesn’t have the laminated clear protective layer of the standard P-Touch labels.
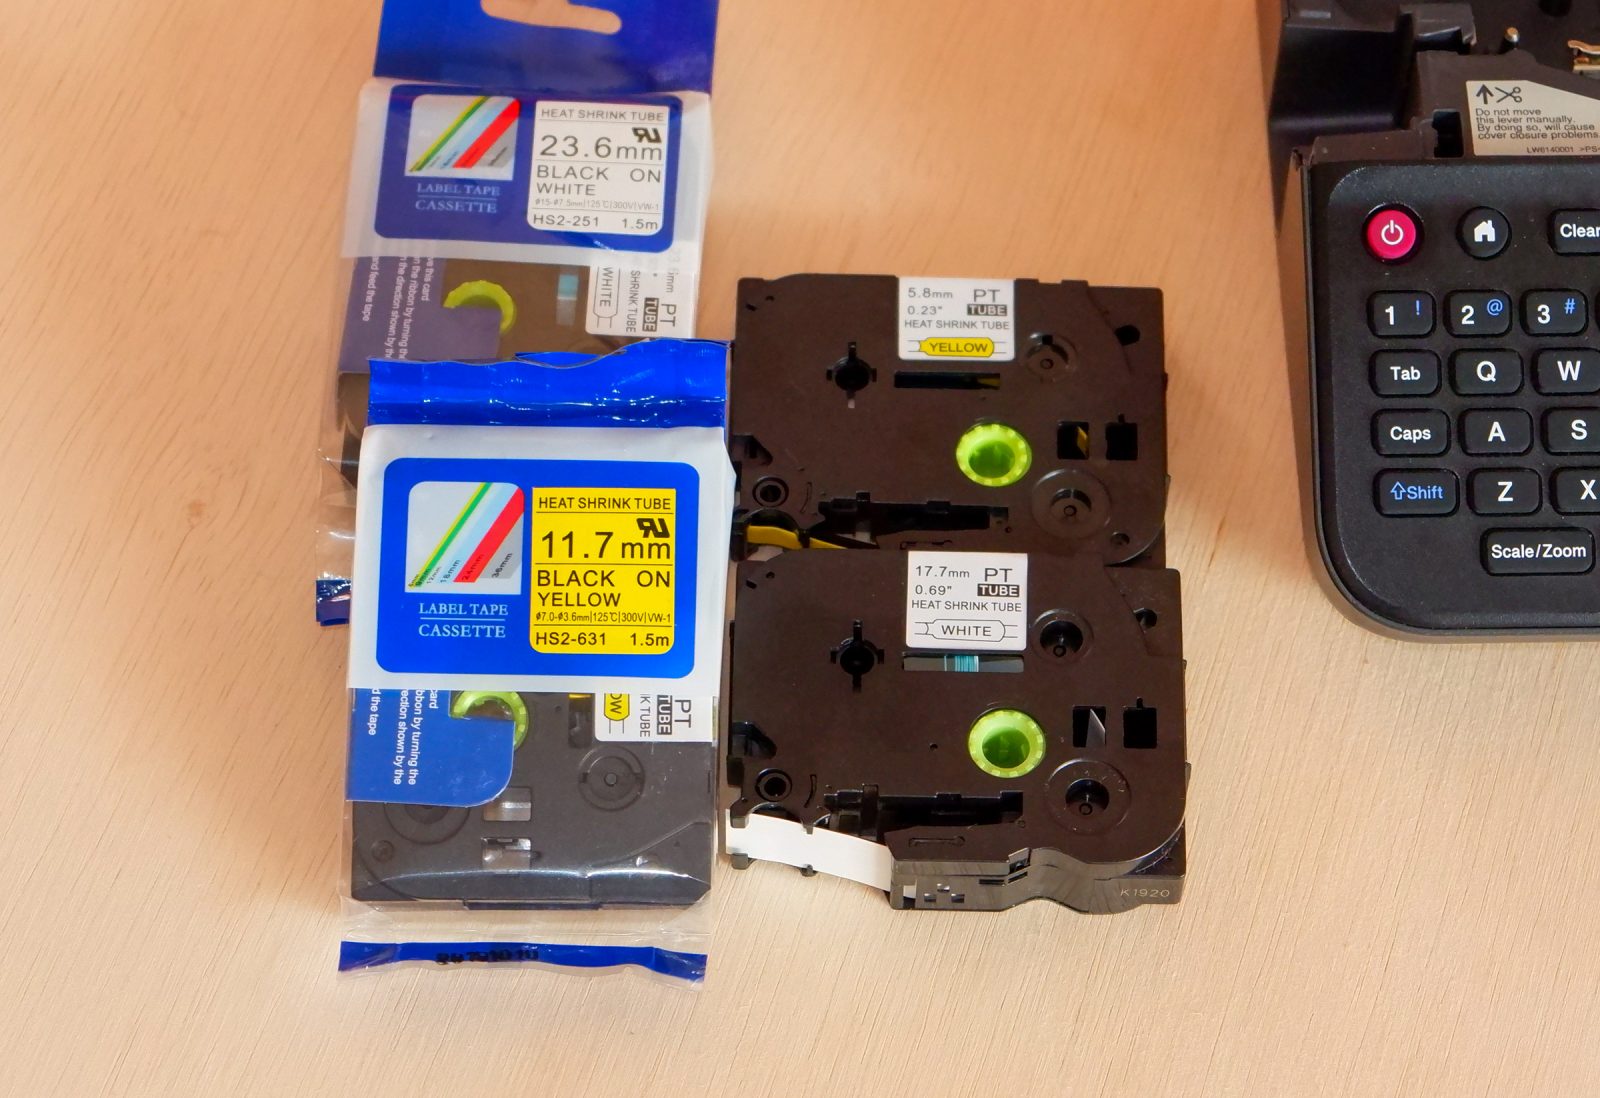
I now stock heat-shrink tubes in 5.8, 11.7, 17.7, and 23.6mm widths. Heat-shrink cassettes aren’t super expensive on a per cassette basis but on a per foot basis they’re kind of pricey. Standard P-Touch label cassettes hold 8 meters of tape the heat-shrink cassettes are all 1.5 meters. I’m usually able to find them for about $8 a cassette for aftermarket or $20+ for genuine Brother cassettes.
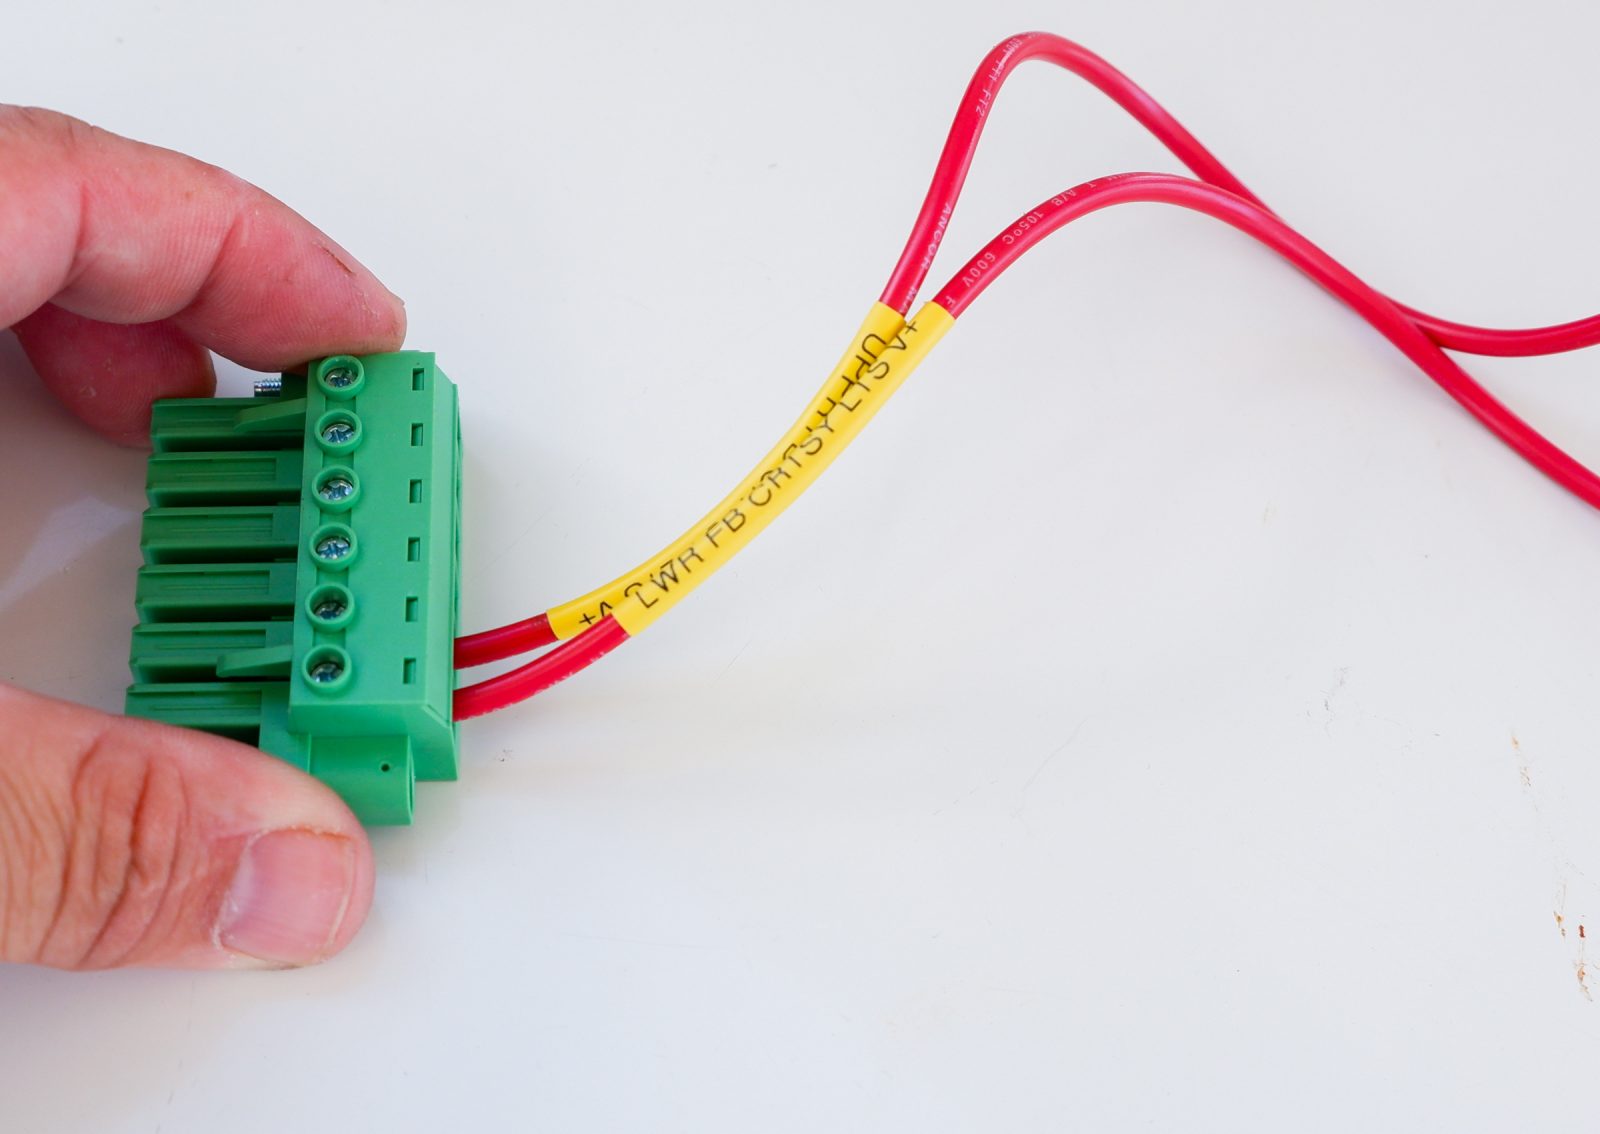
Although it’s a simple thing, the ability to quickly, durably, and legibly label cables is a big plus and one I find quite satisfying. If I find a stray wire I can now quickly tell if it’s a vestige of some previous install or perhaps an important wire that’s slipped out. Plus, if I ever sell Have Another Day perhaps my new found habit of labeling my wires will give the next owner a fighting chance of figuring out what I’ve done.




Great idea. Have always struggled with labeling
Seems not very long ago I asked about this and now you have found the way! great stuff.
Great idea for new wiring. What is needed is a way to label existing wires without having to disconnect and that may not work if the wire is terminated in a ring or spade connector. Appreciate all the great info that you provide.
The best option I know about is a tape flag, or for larger diameter cables the label wrap works well. I’ve only had trouble with the tape delaminating on smaller cables where the bend radius is very tight.
I have also had good luck with going up a couple of sizes in the tape to slip over a smaller termination, like a spade or small ring terminal but that wont’ work for large connectors like MFD power, waterproof Ethernet, etc.
I did experiment with cutting the tube open and trying to then shrink wrap it once I’d slipped it on the wire. Suffice it to say that didn’t work. They just fell off.
If anyone has a better solution for existing wires or those with large connectors on them I’d love to hear about it.
-Ben S.
We will often print on the heatshrink tube, then slip this over a cable tie and cable tie this to the cable – it might take a second or two longer to identify the cable in a years time, but it’s a damn site faster than having to re trace a cable. This works for larger connectors such as DVI and also allows you to use thinner print on heatshrink, as you know the price goes up exponentially with the larger sizes.
Fancy that, good to know.
I have one of these, labels last a long time even with rough abuse:
https://www.3m.com/3M/en_US/company-us/all-3m-products/~/3M-ScotchCode-Write-On-Dispensers-and-Rolls/?N=5002385+3294248035&preselect=8710679+8712823&rt=rud
The trick is that the dispensed label is quite long, with a long clear acrylic tail. So once you’ve wrapped it round the wire the clear tape protects your writing.
This would work well for many, but since I can’t read my handwriting on a good day I look for solutions where it’s printed by machine. It’s the downside of having the handwriting of a spastic second grader.
-Ben S.
If I have the time and inclination, I do the following: print a label with my label writer, stick it on the white bit of a Scotchcode label, then wrap Scotchcode label on wire.
Of course, another requirement is to remember slipping the heat shrink tube over the wire before crimping on the lug. Another great article! I had no idea clear heat shrink tubing was even available and I certainly know of any that would be compatible with a Brother label maker.
My 2 cents. After trying many label systems, seeing others in use or coming back labels years later and seeing how they age, we have settled on Ptouch using the PTE500 machine https://www.brother-usa.com/products/pte500.
The 500 has a built in cable wrap mode and on 1″ wide tape, it uses only 1 linear inch. Of course, it also burns an inch in the pre-feed.
After wrapping the label, we then cover with water clear heatshrink. It will last as long as the boat. The text is crisp and won’t wear over time.
Other materials and techniques we have seen have liabilities. Cable flags come undone, the glue lets go from itself. It may take years, but it will happen. Heatshink labels are not as crisp and fade over time or rub off. I have been on 20 year old boats and if you touch the label, the text just smears. The 3M label stock is the next best alternative. The drawback is needing to apply it exactly perpendicular to the wire and get the first wrap absolutely tight. Easy to do on the bench, sometimes nearly impossible in some hole you are wiring in.
These days, the PTE label stock is cheap.
https://photos.app.goo.gl/UZbjhK19P9m7jpT7A
https://photos.app.goo.gl/6mPMScfrzTSQrajr8
For some people protecting the labels w/ heat shrink isn’t anal enough – they go that extra step of making really nice videos of the process and include links to the materials. Great stuff.
https://youtu.be/5Lq4WxApf_Q
Eric,
Clearly you have years of experience and a lot of us cruisers rely on the HF modems you distribute in the US. I like the professional capability of the label printer you refer to. What is news to me is the failure of heat shrink labels over time. Gives me pause.
It is less expensive an easier to make a label on your label maker in the usual way, and then use clear shrink tubing to hold the traditional label in place. The label is then double protected and special cassetts are not needed.
In my first project, I used DYMO heat shrink labels to keep my client’s wiring organized. It’s been ten years since then, but I was surprised to see the original tags still there, almost good as new when I revisited the site.
One thing I noticed is that even if it had a library of over 150 symbols and terms, it doesn’t have an apostrophe, comma, and other commonly used marks on the QWERTY keyboard. Nevertheless, if you don’t need these symbols frequently, the DYMO heat shrink label maker is an excellent and long-lasting labeling tool.
I like the professional capability of the label printer you refer to. What is news to me is the failure of heat shrink labels over time. Gives me pause.
I bought a Brother PT-E500 label printer and it cuts (2) labels. One with print and one blank. How do I get it to only print (1) label?
I’m not sure if this is what you’re describing, but… many of the Brother printers will print about a 5/8-inch leader if you set the margins smaller than the labeler can cut.
-Ben S.
Ok, so I have .047″ Tape. I set it to cut a 2″ label with a .3″ margin and it cuts and spits out a 1.5″ printed label and 1/2″ blank.
I’m using and printing from the design software P-touch Editor.
On the unit I just printed out a label 1.8″ long (.047″) wide and it spit out a 1.8″ printed label and a 1″ blank. I’ve got to be doing something wrong.
I was just thinking about this thread as I was working on a Hinkley with a 2’x3′ wall of connections, all with faded and illegible heat shrink labels!
I don’t think you are doing anything wrong, all Brother printers spit out a leader in my experience. With generic label tape so inexpensive I have overlooked this. BTW, if you print multiple “copies” of the same label, it only does the leader once.
I like the professional capability of the label printer you refer to. What is news to me is the failure of heat shrink labels over time. Gives me pause.
It is possible the heat shrink label tech has changed, but I can say for sure 10 to 20 year old labels printed directly on heat shrink stock fade and flake off. This is what drove us to a more permanent solution.
I prefer the Brother that makes labels that are permanent. They have the highest quality setting on their thermal printing system. They perform an excellent job, especially with the features of their system that let you select various customization options and pre-designed templates.