
FLIR C5 thermal inspection camera, finding issues before they’re big trouble
If you’re like me, at some point in your boating career you’ve probably found an electrical problem on your boat only after things got a little scary. Perhaps the problem was one of your making or maybe, like my example linked above, the boat came that way. Now that I’m doing more work on the DC systems aboard my own boats and others, I went looking for a way to ensure the quality of my work and the health of the systems aboard. For the last few jobs, I’ve been verifying my work with a FLIR C5 thermal inspection camera. I think it delivers real peace of mind.
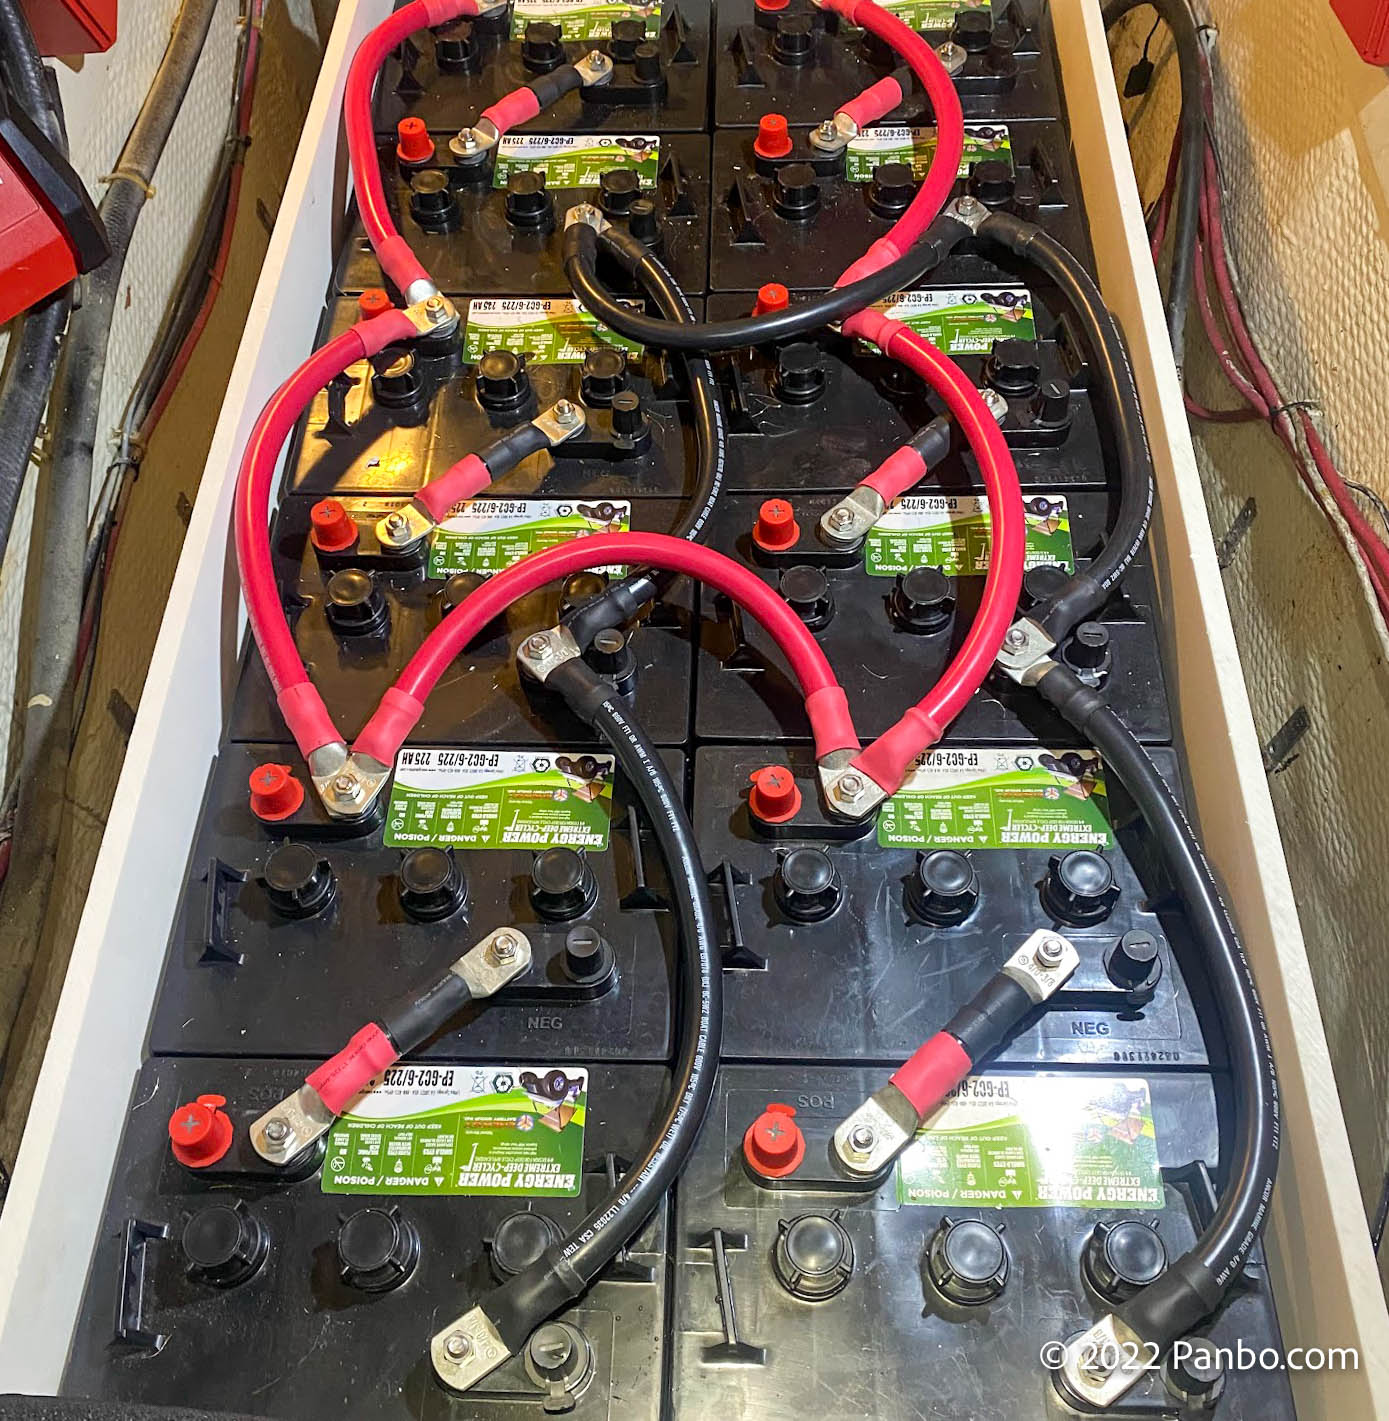
During recent work on a large battery bank, I was looking at the sheer number of terminals and crimps involved. I felt the work called out for a way to verify the quality of each individual crimp and the performance of the battery bank overall. I knew I could use a non-contact IR pyrometer. Those work very well but only measure exactly where you point them. This seemed like an ideal application for a Thermal inspection camera.
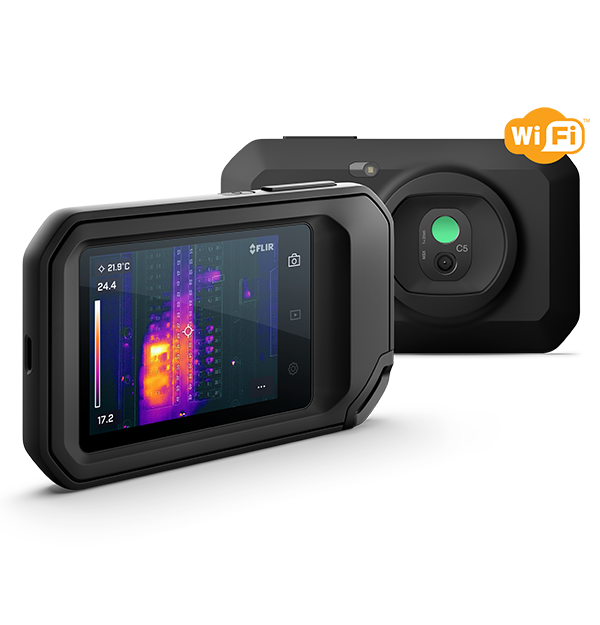
After consulting with FLIR, I selected a C5 thermal inspection camera. The C5 is available on Amazon for right around $700. Although it’s a sizeable investment for a boat tool, it’s a small fraction of what this capability would have cost a few years ago. Plus, I think a thermal inspection camera is likely to prove to be cheap insurance for many boaters. Finding an issue before it’s a major problem usually represents a significant saving in repair costs.

The C5 is just about the size of a cell phone, though it’s a hair thicker. The body of the camera is rubberized and overall it feels quite rugged. I was pleased to find USB-C charging, a responsive touchscreen, and WiFi connectivity. The camera features a 160 x 120 FLIR Lepton thermal sensor and a 5-megapixel digital camera sensor.
My first images with the C5 included a quick survey of some recently completed work. I placed a large load on the battery bank and started snapping pictures. The thermal images produced by the C5 are great. They quickly allowed me to see the range of temperatures present in the image and identify any hotspots. Despite a 5-megapixel rating, the visible-light images are pretty lackluster. I’d say they remind me of a cell phone camera for ten or more years ago. But, they’re perfectly adequate to orient what you’re seeing in a thermal image.
By default, the camera produces what FLIR calls MSX images. MSX is short for Multi-Spectral Dynamic Imaging and means that FLIR combines a base thermal image with a visible light image to provide greater detail and edge definition in the images produced. The slider above lets you see the difference between an MSX image and an all thermal image. It’s much easier to tell what you’re looking at with the edge definition MSX provides.
Thermal MSX image from C5 
All thermal image from C5 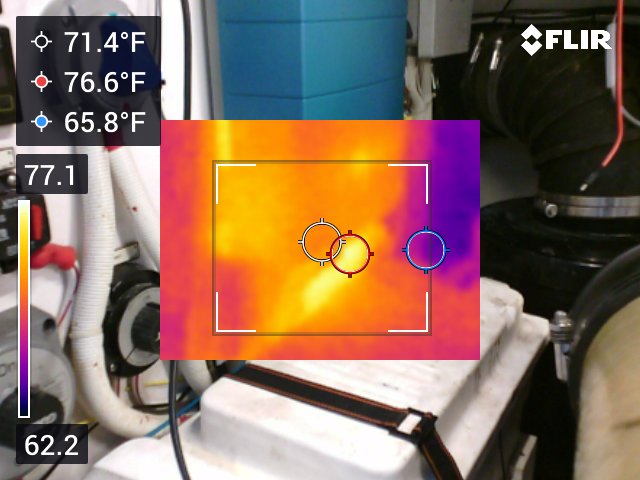
Thermal picture in picture from C5
The camera can take one of four image types: MSX, which I discussed earlier, a pure thermal image, a visible light image, and picture-in-picture with thermal in the center and visible light around it. As I’ll discuss a little later, all the image types except visible-light can be reprocessed later into other types.

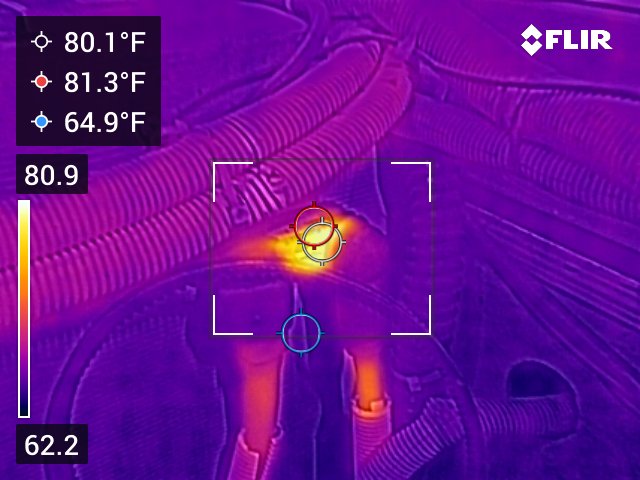
Just to the left of the FLIR logo in the image above, you might notice a hot spot in the battery cable. I noticed this too and wanted to make sure there wasn’t cause for concern. FLIR has a wealth of tools that make it possible to review and manipulate the camera’s images.
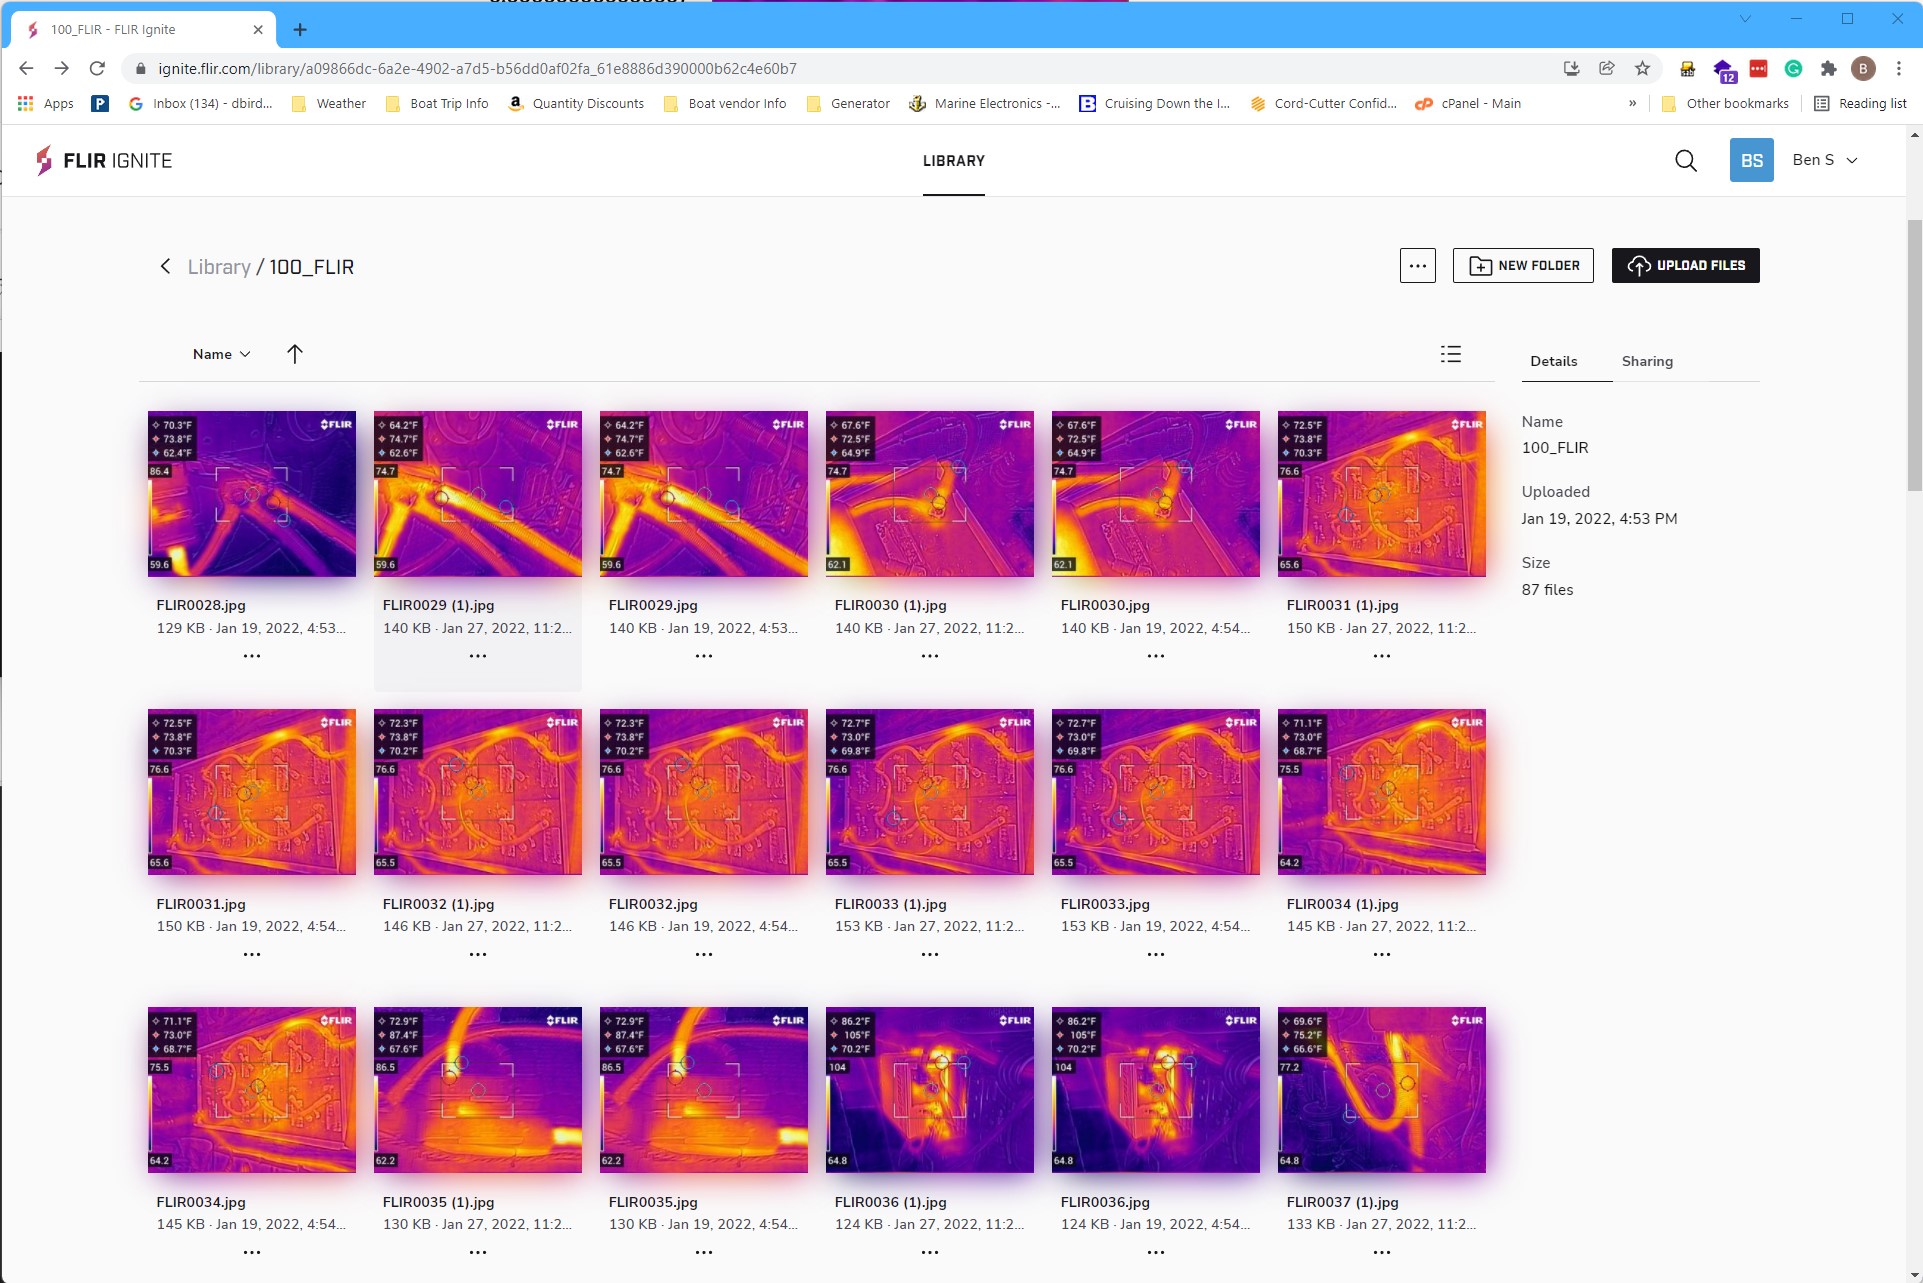
The camera comes with a free 1-gigabyte FLIR Ignite account that allows the camera to automatically synchronize images taken on the camera with FLIR’s cloud. Each image is only about 150-kilobytes, so you should be able to store upwards of 6,000 images with the free account.
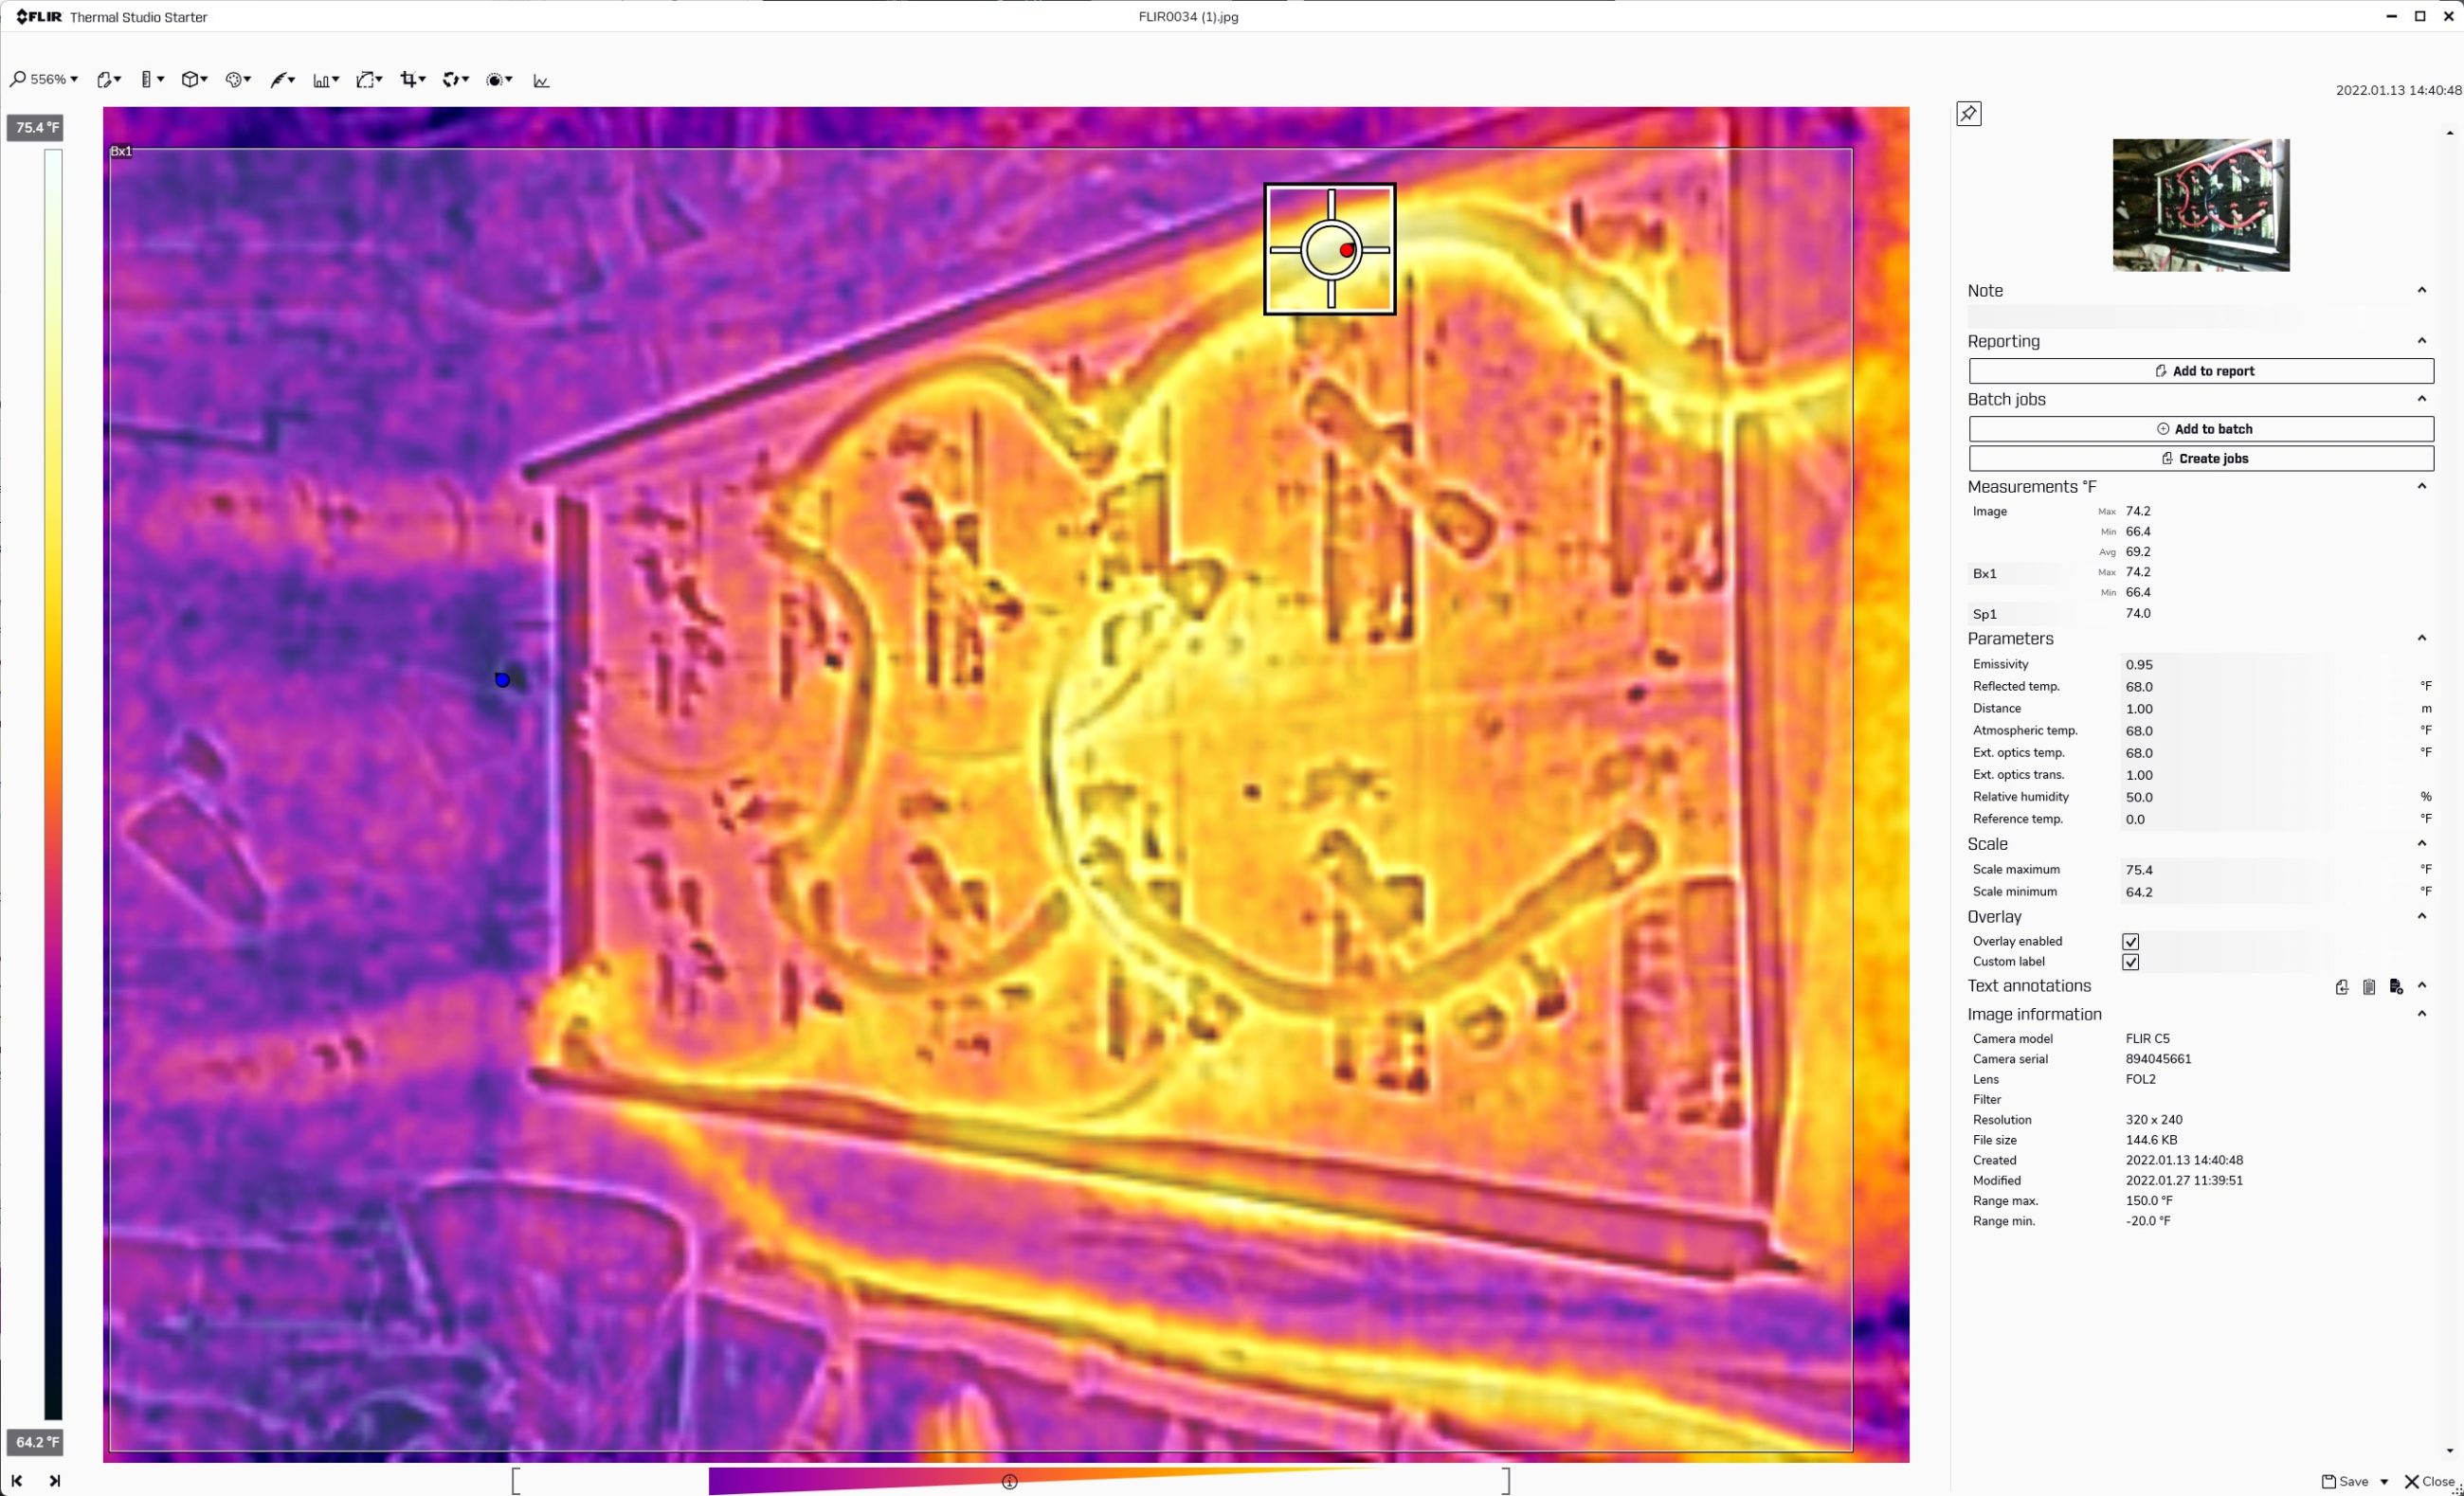
Once images are synced to the cloud I downloaded FLIR Studio and used the ignite sync tool to synchronize the images to my computer. Then, in Studio I can do nearly any amount of post-processing. For example, by default, the camera adds information in the legend on the top left. That includes temperature at the center of the image and the minimum and maximum temperature in the small box around the center of the image.
But, in my example image above I wanted to know about the temperature of the battery interconnect towards the top left of the image. So, I added a spot meter — represented by the circle with cross-hairs — and can see on the right of the studio image that it shows the temperature is 74.0 degrees Fahrenheit. Phew, the temperature of the cable might be slightly higher than other areas but at 74 degrees it’s not a cause for any concern.
Armed with this information, I can also tell that the negative cable running across the bottom of the image isn’t very warm. It’s the same basic color as the one at the top and the data box tells me the maximum temperature on the image is 74.2 degrees.
I’m going to be getting my ABYC electrical certification later this spring so I have the study material for the course. I’ve been reviewing it and in a convenient coincidence of timing, I just read a section that mentioned thermal differences in electrical connections. The study materials suggest that variances of less than 25 degrees Fahrenheit are acceptable. So, I feel pretty good about a departure of only a few degrees with a large load being drawn from the batteries.
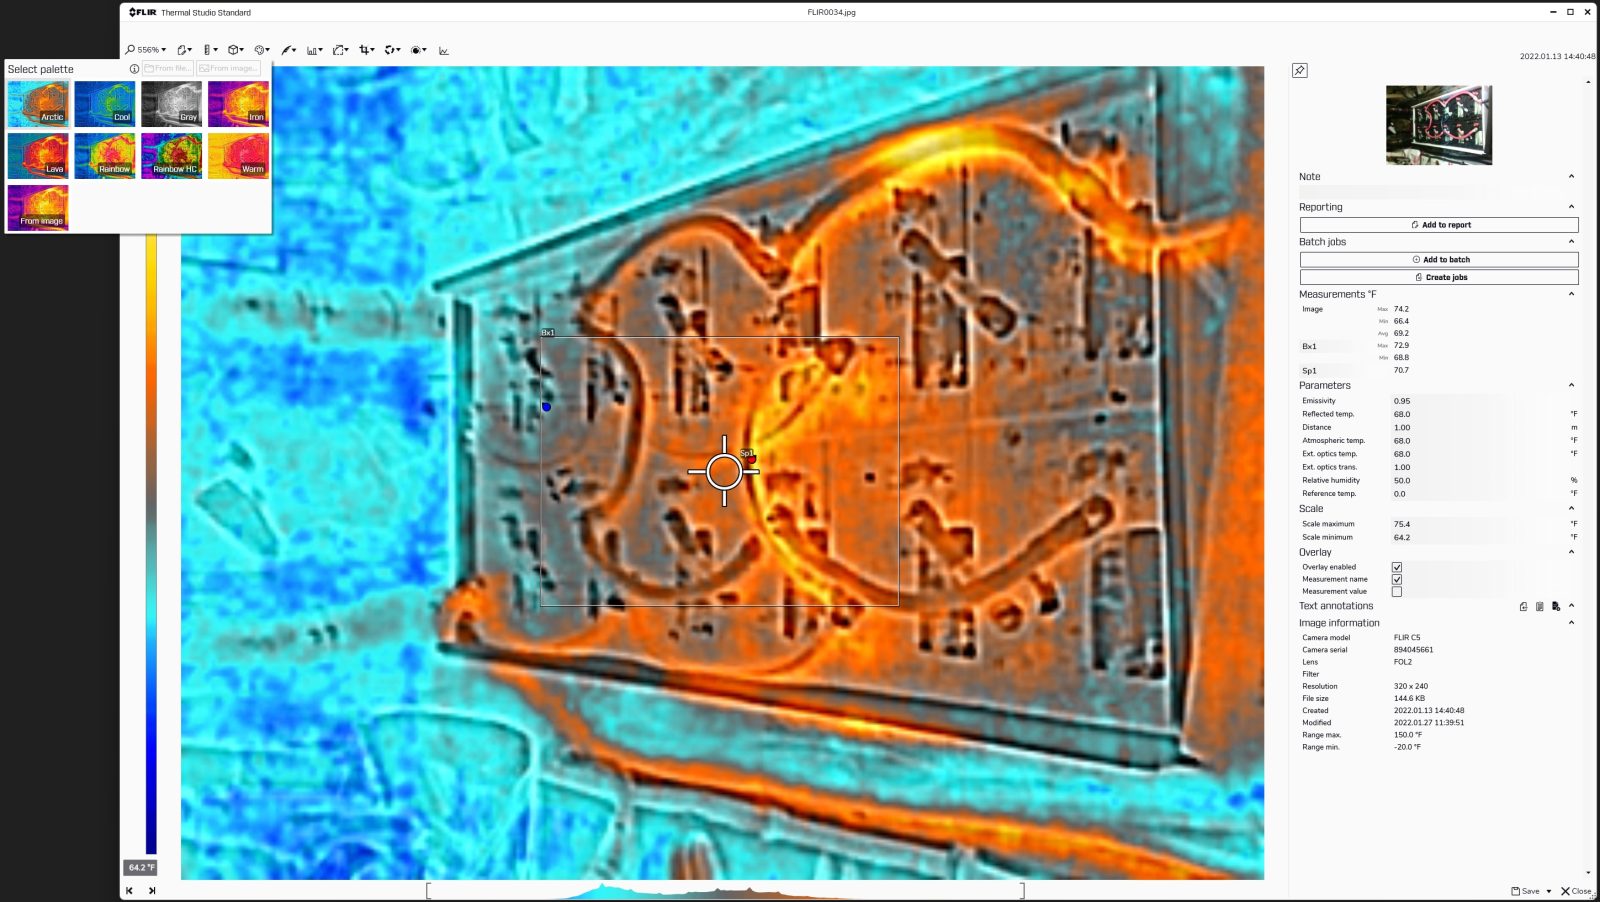
When the camera captures an image it also captures all of the sensor’s radiometric (temperature measurement) data. With this data, an image can be edited after capture to change color pallets, add measurements, change image type, and more. The ability to go back and carefully review the data captured is invaluable. It means that I can quickly snap several pictures of an area and go back to study them later.
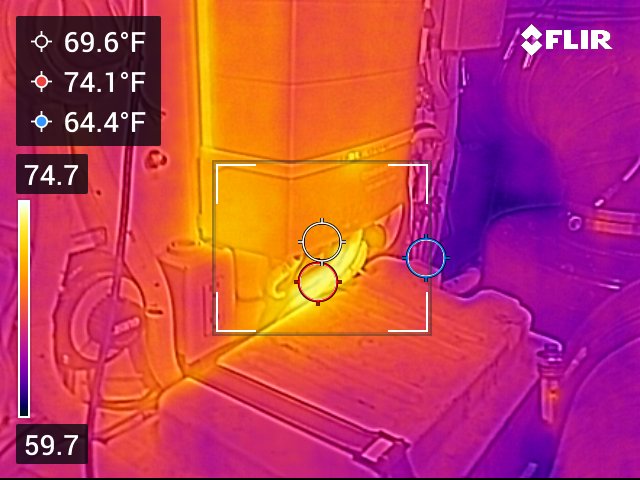
I’ve had the camera for several weeks now and continue to find new uses for it. Today I checked my shore power cord. Although I found mildew has attacked the boot, the thermal image confirmed no heat build-up in the connection.
I’ve also found a few less useful but more entertaining uses for the camera. I was struck in this image by what a good job MSX did in showing the cat’s markings on the thermal image.
When I described what I was looking to do with the camera, FLIR strongly recommended the C5. But, there are other options from FLIR including the One that attaches to a mobile phone. Several electrical tool manufacturers, like Klein Tools and Fluke, also offer thermal inspection cameras. I don’t have hands-on experience with these other brands but it’s worth noting that a great deal of the value of the camera comes from the software tools. Being able to analyze and manipulate the images after capture has proven very valuable.
The C5 is definitely going to become a must-have in my tool bag. Being able to inspect my work and verify the health of connections delivers peace of mind. Plus, finding faults before they’re big problems is tremendously useful. I’ve already added a quick scan of Have Another Day’s electrical panels to my monthly checks. I’d love to hear from others about how you are using thermal scanners aboard your boat or in your work.


I’ve been happy with my Seek Thermal which I got on the Kickstarter a few years ago. They’ve added a couple of models but the base Compact at (currently) $226 on Amazon is all I need.
Great article and what an awesome way to see if you may have an issue. Thanks for sharing
Good article, Ben. I could have used one of those last week, when I noticed a .5V drop across an ATC fuse and discovered it was warm to the touch. A new fuse solved both problems.
Your cat, however, appears predictably unimpressed…
Could this be used to identify the source of a leak? I’ve noticed water in a lip of my headliner but can’t seem to find the source. Get the boat warm, spray some water outside and look for a cold path?
I would expect it would work for working backwards through what’s wet. In my usage, wet objects show up as cooler than dry, so I would think a wet headliner or similar materials would be cooler.
-Ben S.
@chris Maybe the other way around? Get the boat cold and spray hot water? But…as a general approach, I would suggest successive tests spraying incrementally higher – water almost certainly is travelling downhill.
Is there any reason that one of their larger monocular couldn’t double for night vision and detecting hot electrical issues?
I think you could but I don’t think it would be much of a cost savings. The Scout TK (https://www.flir.com/products/scout-tk/) is $599 making it awfully close in cost. Plus, it lacks a visible light camera so you wouldn’t get MSX which really does make it easier to discern what you’re seeing.
I’m not sure if the Scout will produce radiographic JPEGs that allow the kind of post processing I found so useful.
-Ben S.