Helm ergonomics part one: Junior’s makeover
This spring and summer I redid all three of my boat helms — Junior’s above, plus the flybridge and pilothouse stations on Gizmo. So I’ve been thinking a lot about what electronics I need and/or want in those different locations and how to arrange them just so for maximum utility. And I’m eager to share my thoughts and photos in this Part One of a three-part series. But first a complex disclaimer.
- While I set up all these helms primarily for my own use, and often chose and purchased my favorite tool for the job, please don’t presume that I endorse any of the gear as the best in their category.
- There are simply too many extenuating circumstances.
- For instance, I already owned many of the sensing devices and the autopilot system on Gizmo, and saw no compelling reason to explore alternatives.
- Moreover, these projects were budget-constrained, because I’m careful that way and three new helm systems are a lot.
- Plus, I’m not completely done with borrowing equipment for longish term testing, as with the Humminbird Solix 10 now helping me to catch lobsters from Junior.
- Finally, as always, my best-of-breed product may not be yours, for many good reasons.
However, I will highlight many great products in this series, and I’ll try to be clear about who owns them. And as I detail the three helms, I will also digress a bit regarding install and feature details, but this series is mainly about why I installed the particular assemblies of gear and what I did to maximize their usefulness to my kind of boating. Ergonomics is one expression for this theme, and hopefully you’ll come away better able to apply that practical science to your own helm(s).
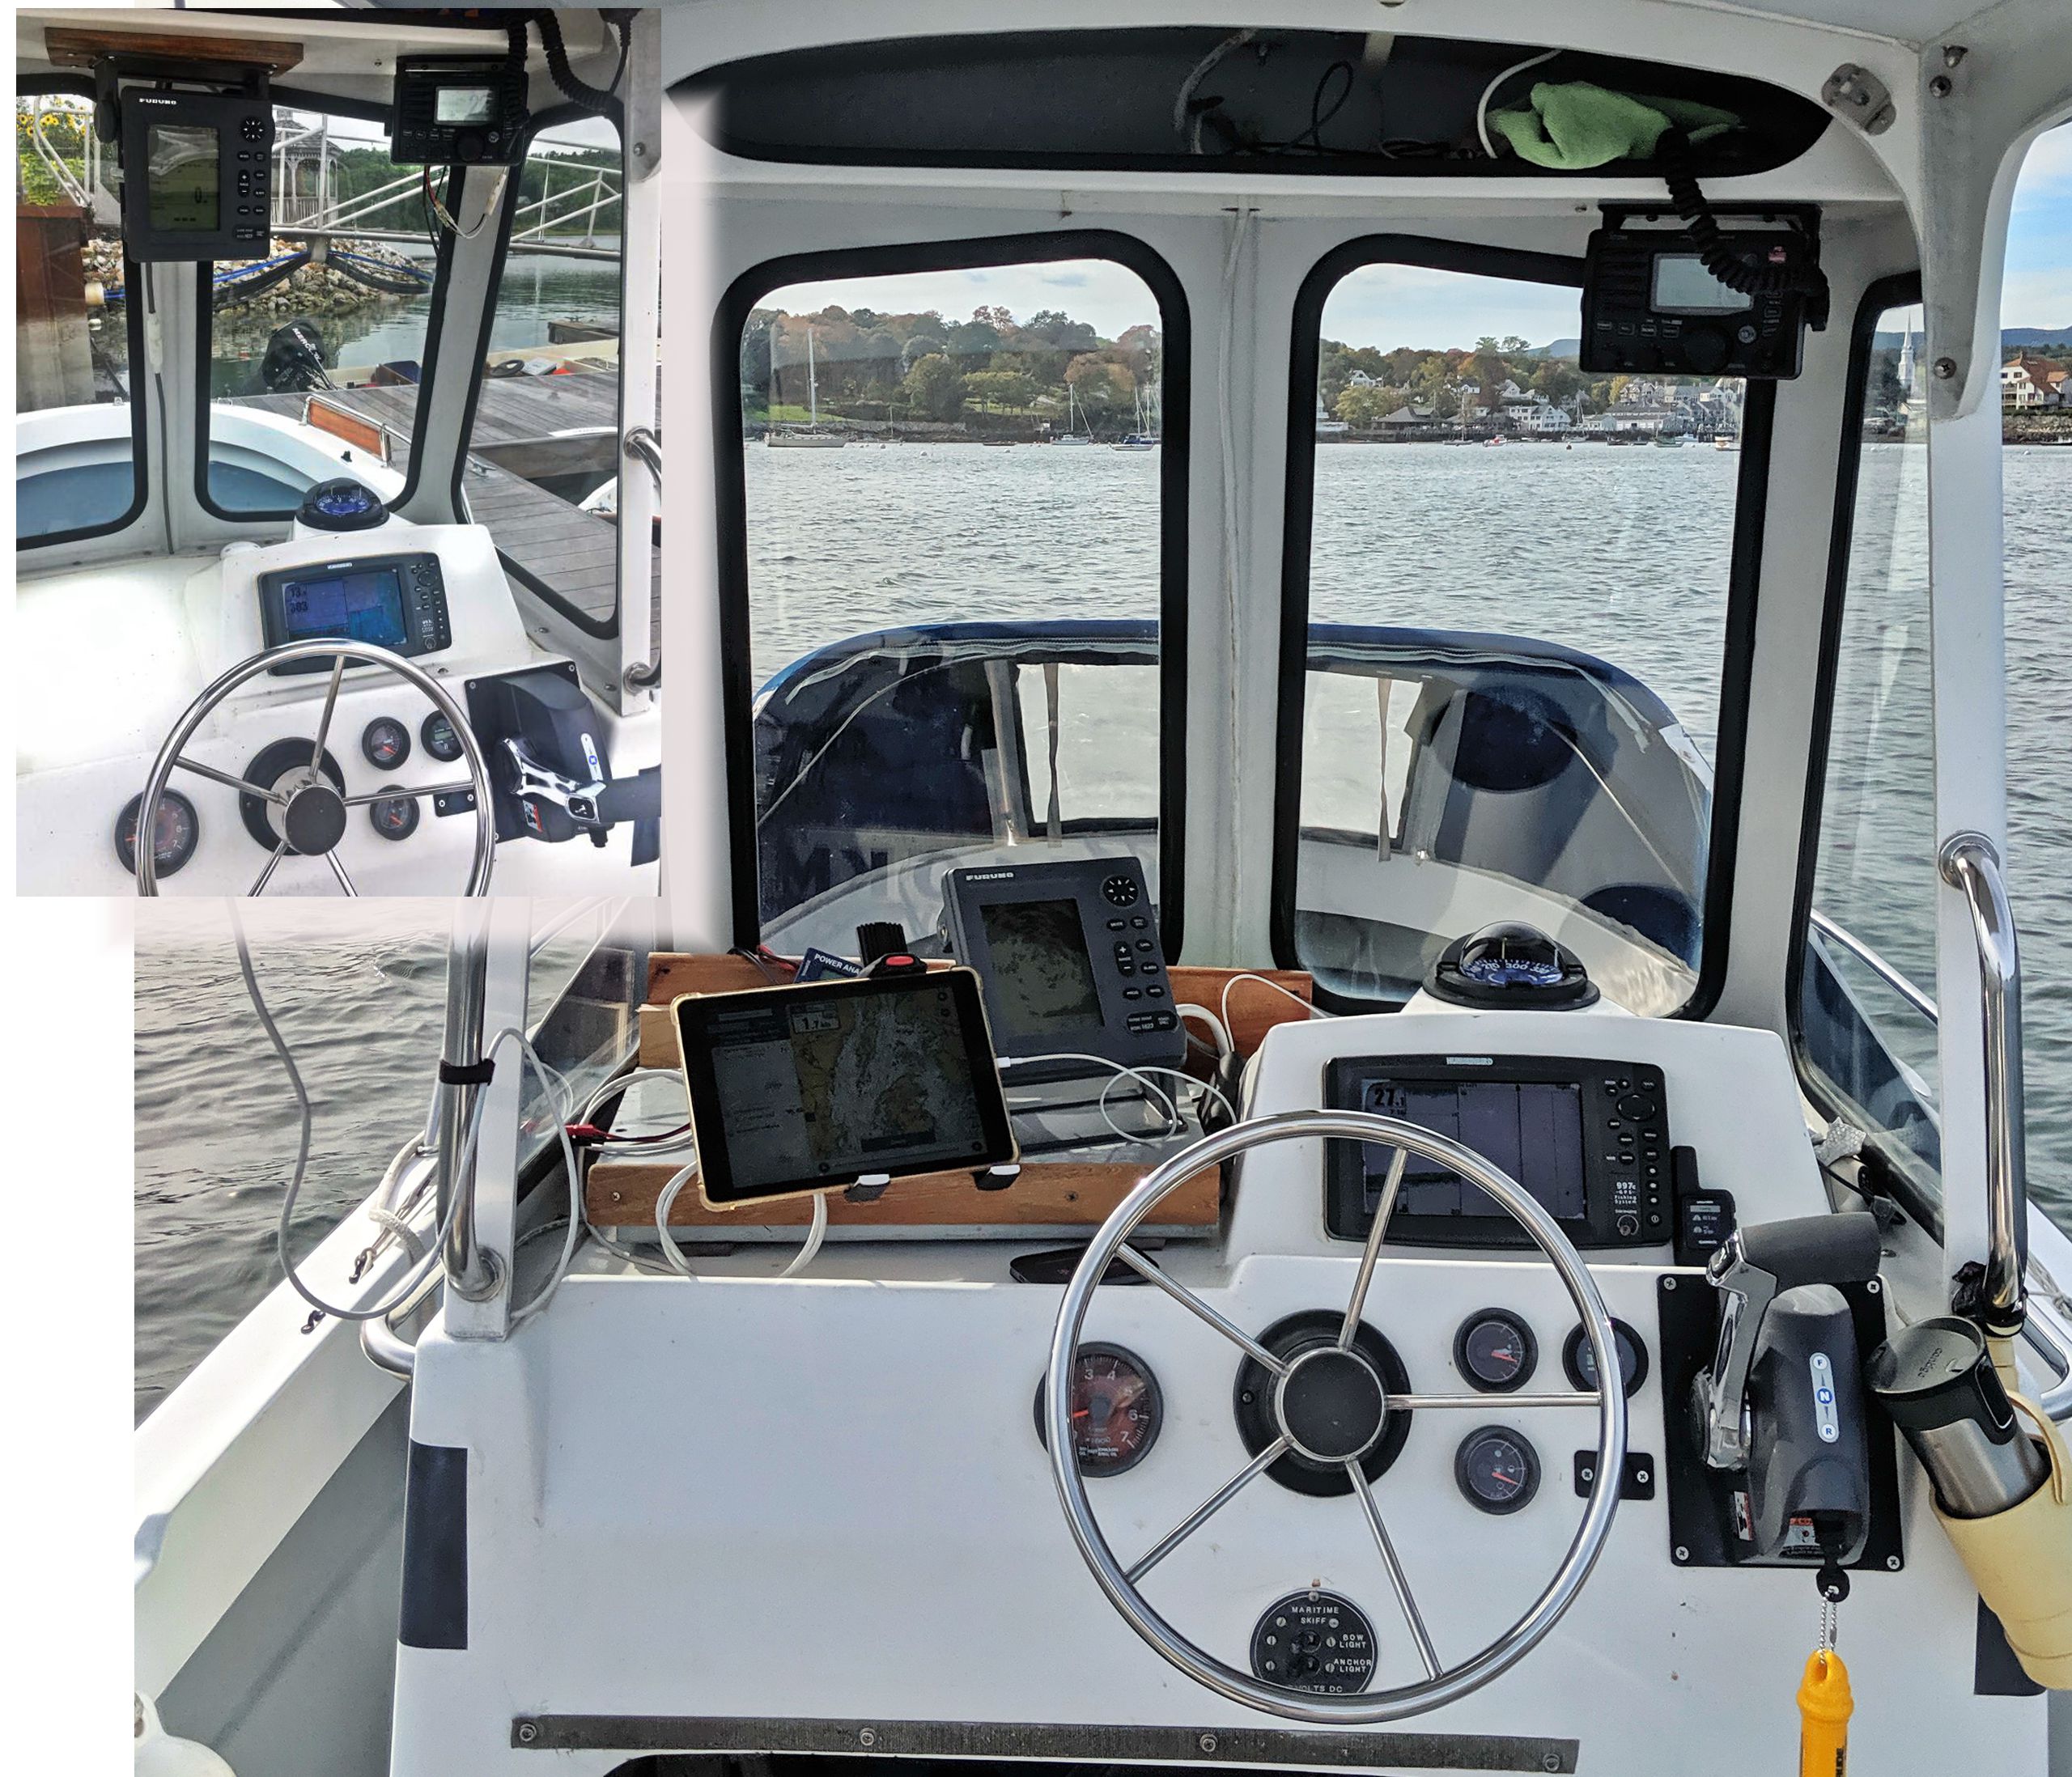
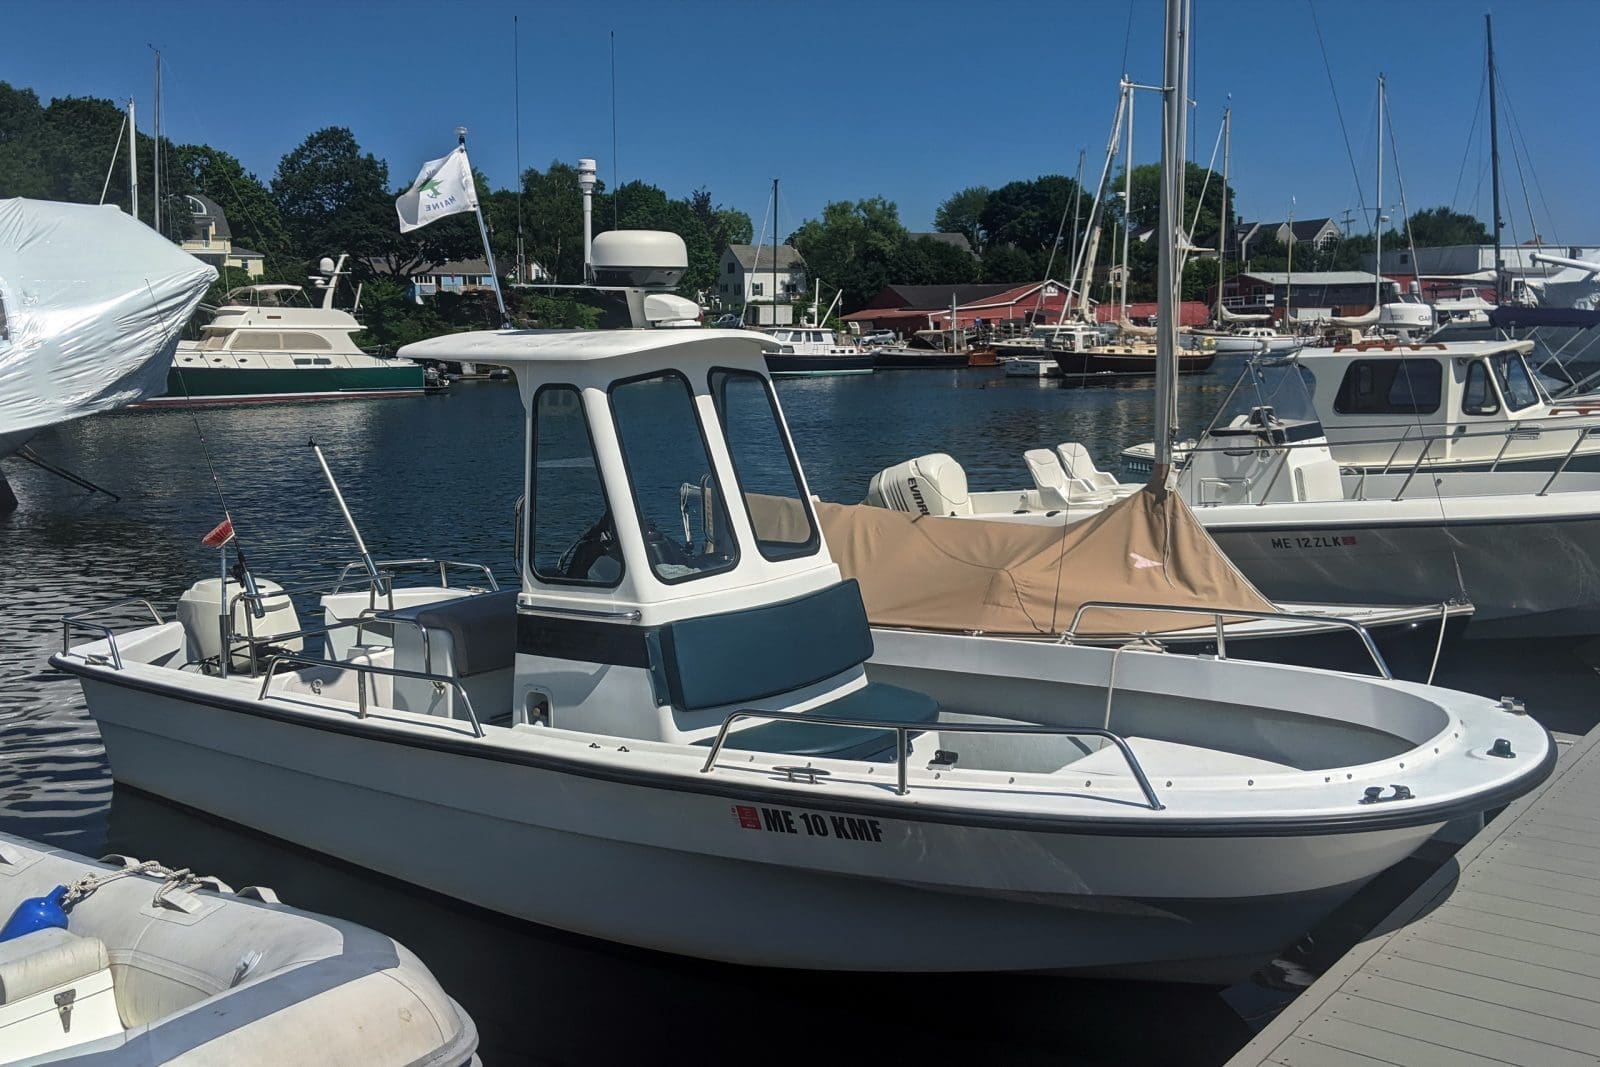
Here’s the Maritime 20D now fully dubbed Gizmo Junior on first pre-purchase sight a year ago (upper left), and then as sloppily modified for an October testing cruise. All the gauges and electronics actually worked, but what I was pleased to purchase was an excellent hull and outboard combination for zipping around midcoast Maine and hopefully catching some seafood.
For instance, it was immediately obvious that the Icom VHF and Furuno 1623 radar hanging from the overhead hindered my 5-foot 10-inch body’s sightlines at the helm, and that seeing well in front of the boat is darn important at 20 knots plus in waters often mined with lobster trap buoys. So I immediately remounted the radar head lower (and thus also learned that it works quite well given its age and grayscale, analog tech).
By contrast, the engine gauges were mounted too low to read easily and, worse, they were old bottom-of-the-line Evinrude models that weren’t replaced when the boat got its second E-TEC 115 H.O. installed a few months before my purchase. And I knew — thanks to research, and especially the good folks at Bamforth Marine — that either of those E-Tecs could have delivered more information, more accurately, to better gauges and also to NMEA 2000 displays without major added cost.


So this spring I replaced almost everything at the helm, and also went at it with a can of Rust-Oleum HP semi-gloss black spray paint. It sort of matched and completed the black band already around the other sides of the little pilothouse and, more important, I knew that even modern bright electronics screens would be easier to read with a black background.
My DIY style very rarely achieves yacht quality, but I like how the paint gave the 20-year-old crazed gel coat a worn leather look, which you can see better in my entry about also stripping off Junior’s many decals. Not a yacht, but pretty sharp, I think.
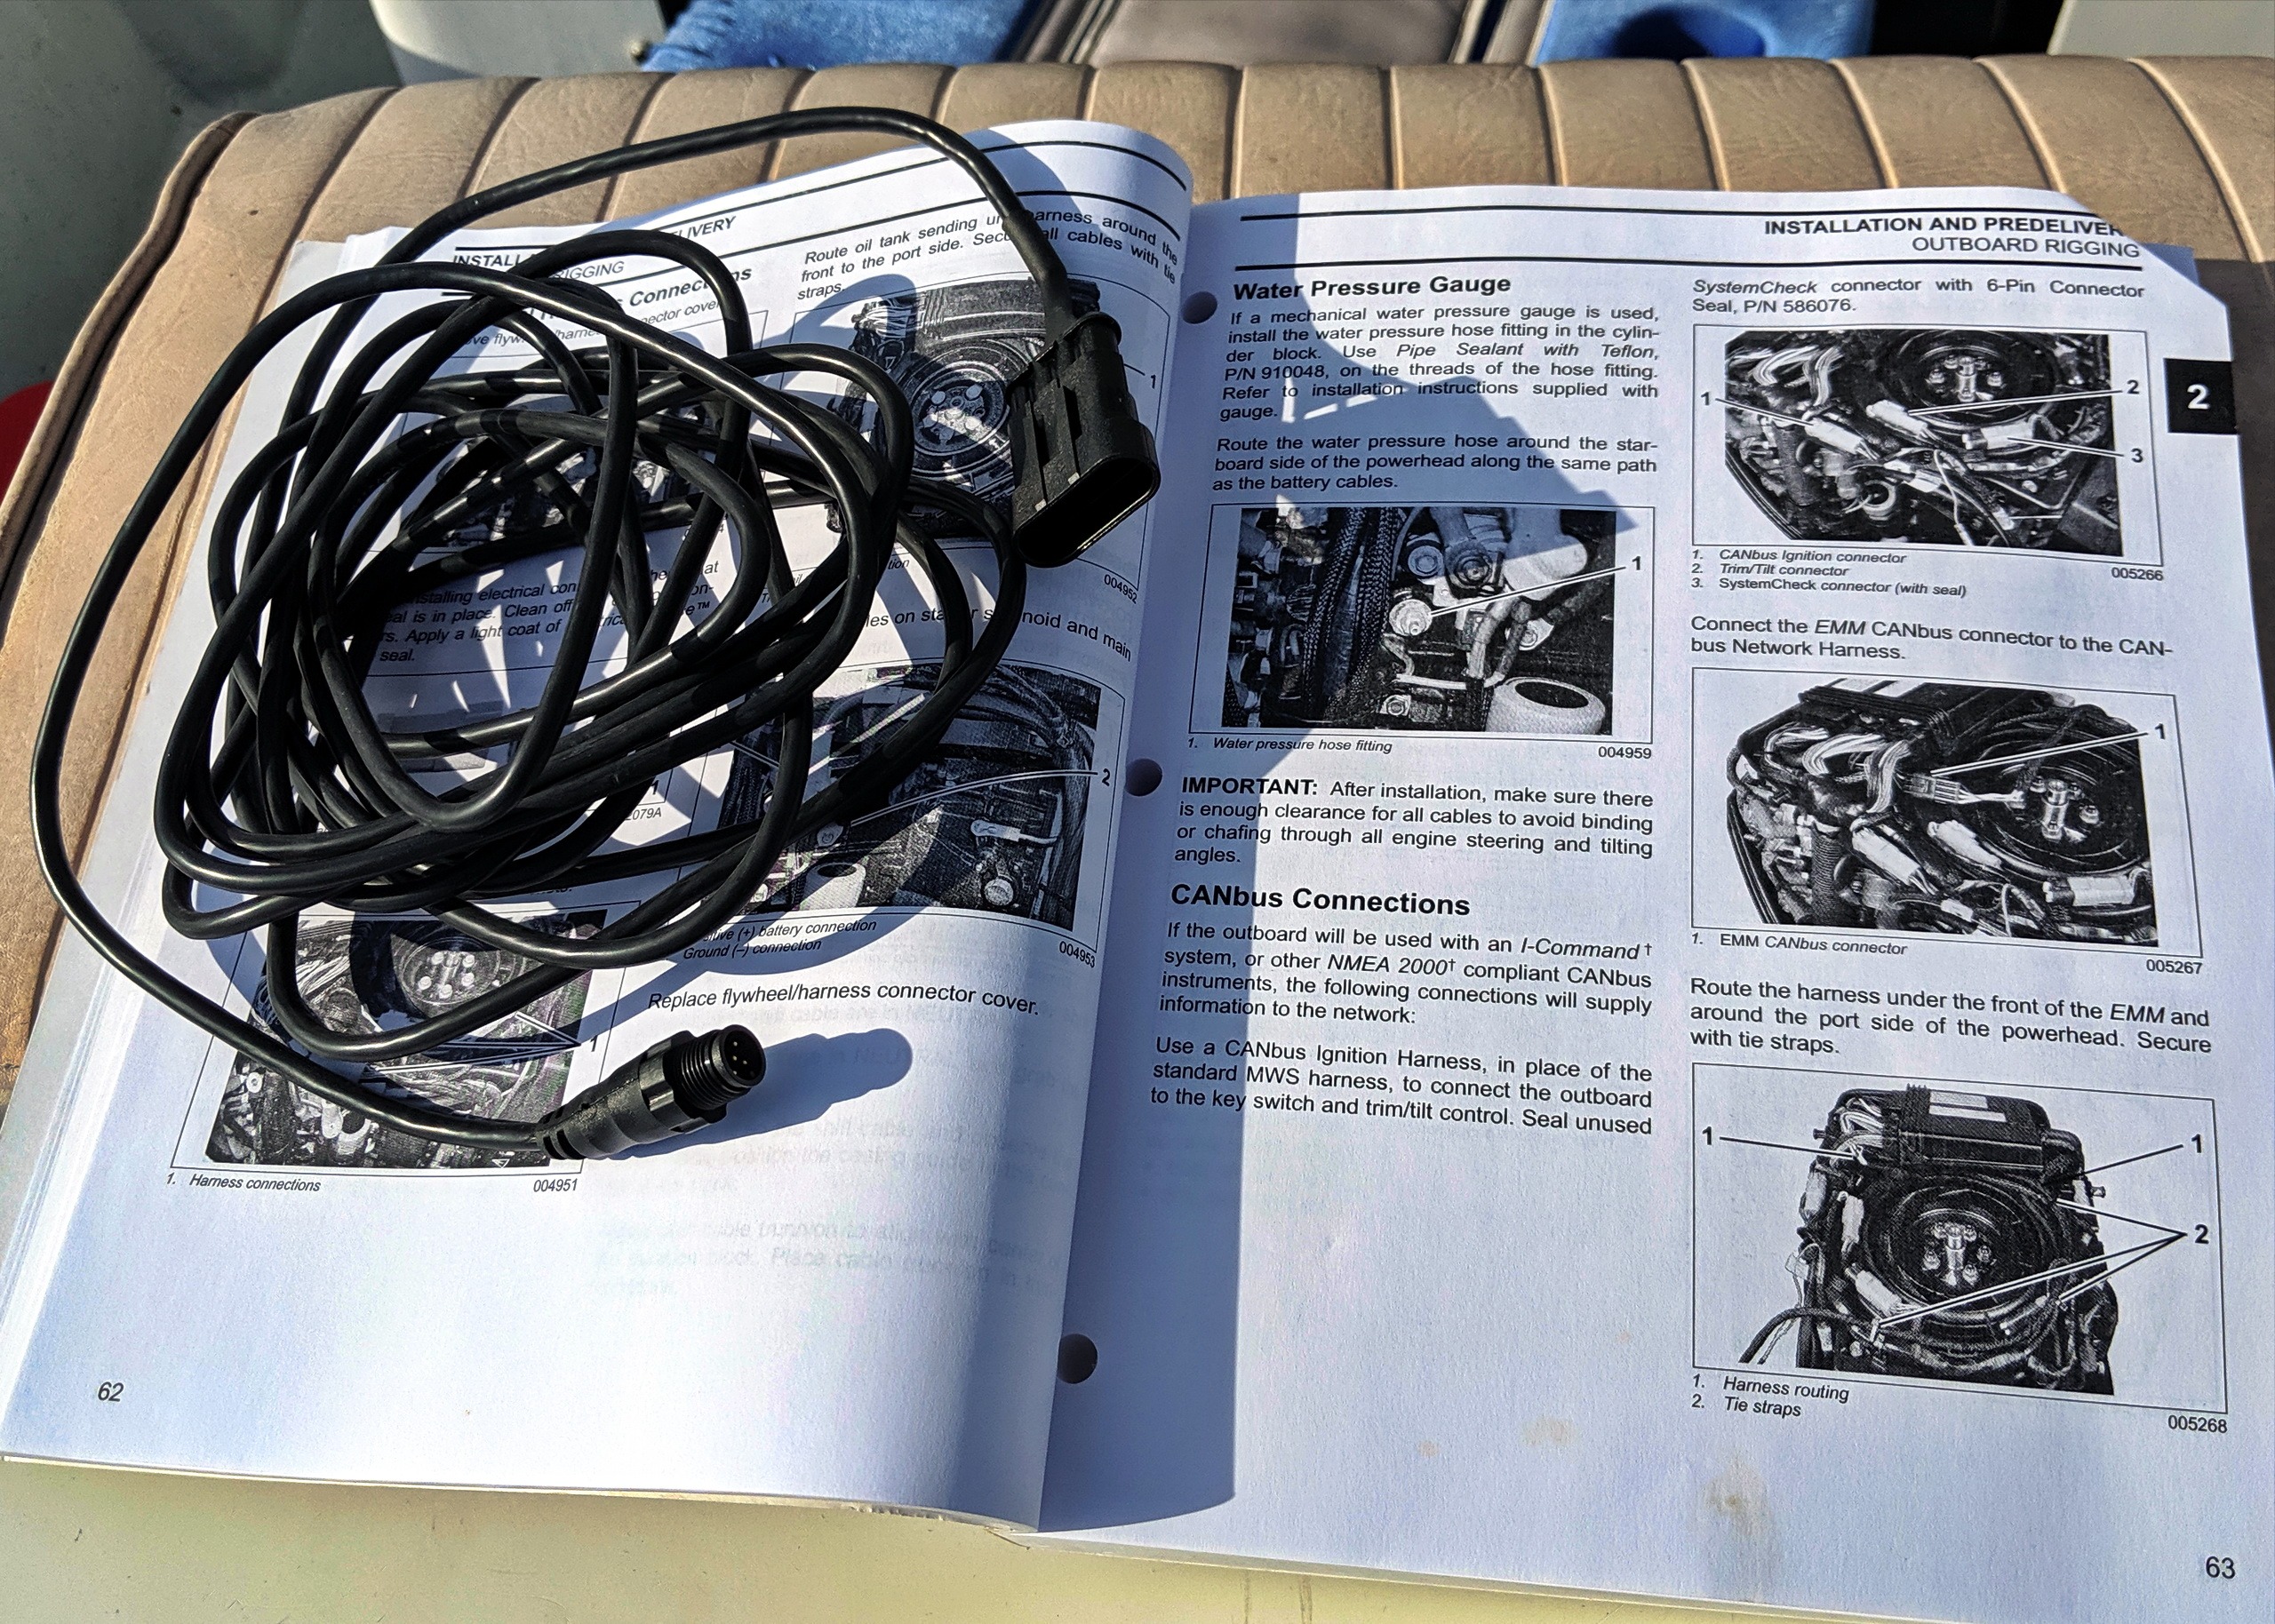

A new electronics plan was pretty much finalized before stripping Junior, and, in fact, I had already purchased, installed, and tested a $60 E-TEC EMM cable (part 0766026) with good results. Running the adapter cable from the outboard’s engine management module to a new N2K network based in the console was fairly straightforward, and some of the valuable data seen on the Garmin 742 screen above — like fuel flow and coolant temp — simply wasn’t available on the vague old gauges, let alone most every more easily read N2K display I tried.
It might seem bizarre that NMEA 2000 engine data output was always an E-TEC option (BRP retired Evinrude last May, though I’m fairly confident that parts and my extra long warranty will be available if needed). But it also suggests that there are lots of good E-TECs out there that might benefit from this moderately simple upgrade, and maybe even last longer because the owner can better see how their engine is behaving.
I also bought a 4-inch Icon Pro Tachometer for $400 (Bamforth beat Amazon) that you’ll see further down. The E-TEC’s NMEA 2000 output is not dependent on the new gauge, but its small screen (poorly) displays every bit of data and diagnostic info that the EMM can put out — not guaranteed of other N2K displays — and it also has an analog input for the outboard’s trim angle and can be used to invoke its nifty self-winterizing feature.
Finally, note that I described the install of this E-TEC update with qualifiers like “fairly straightforward” mainly because the manuals seem oriented to Evinrude service pros, who can probably rig this cable and related gauges in their sleep (and may be the best way to go). On the other hand, hardcore DIY types can find lots of E-Tec N2K and gauge information on the Web, especially the extensive work of Jim Hebert at continuousWave.com.
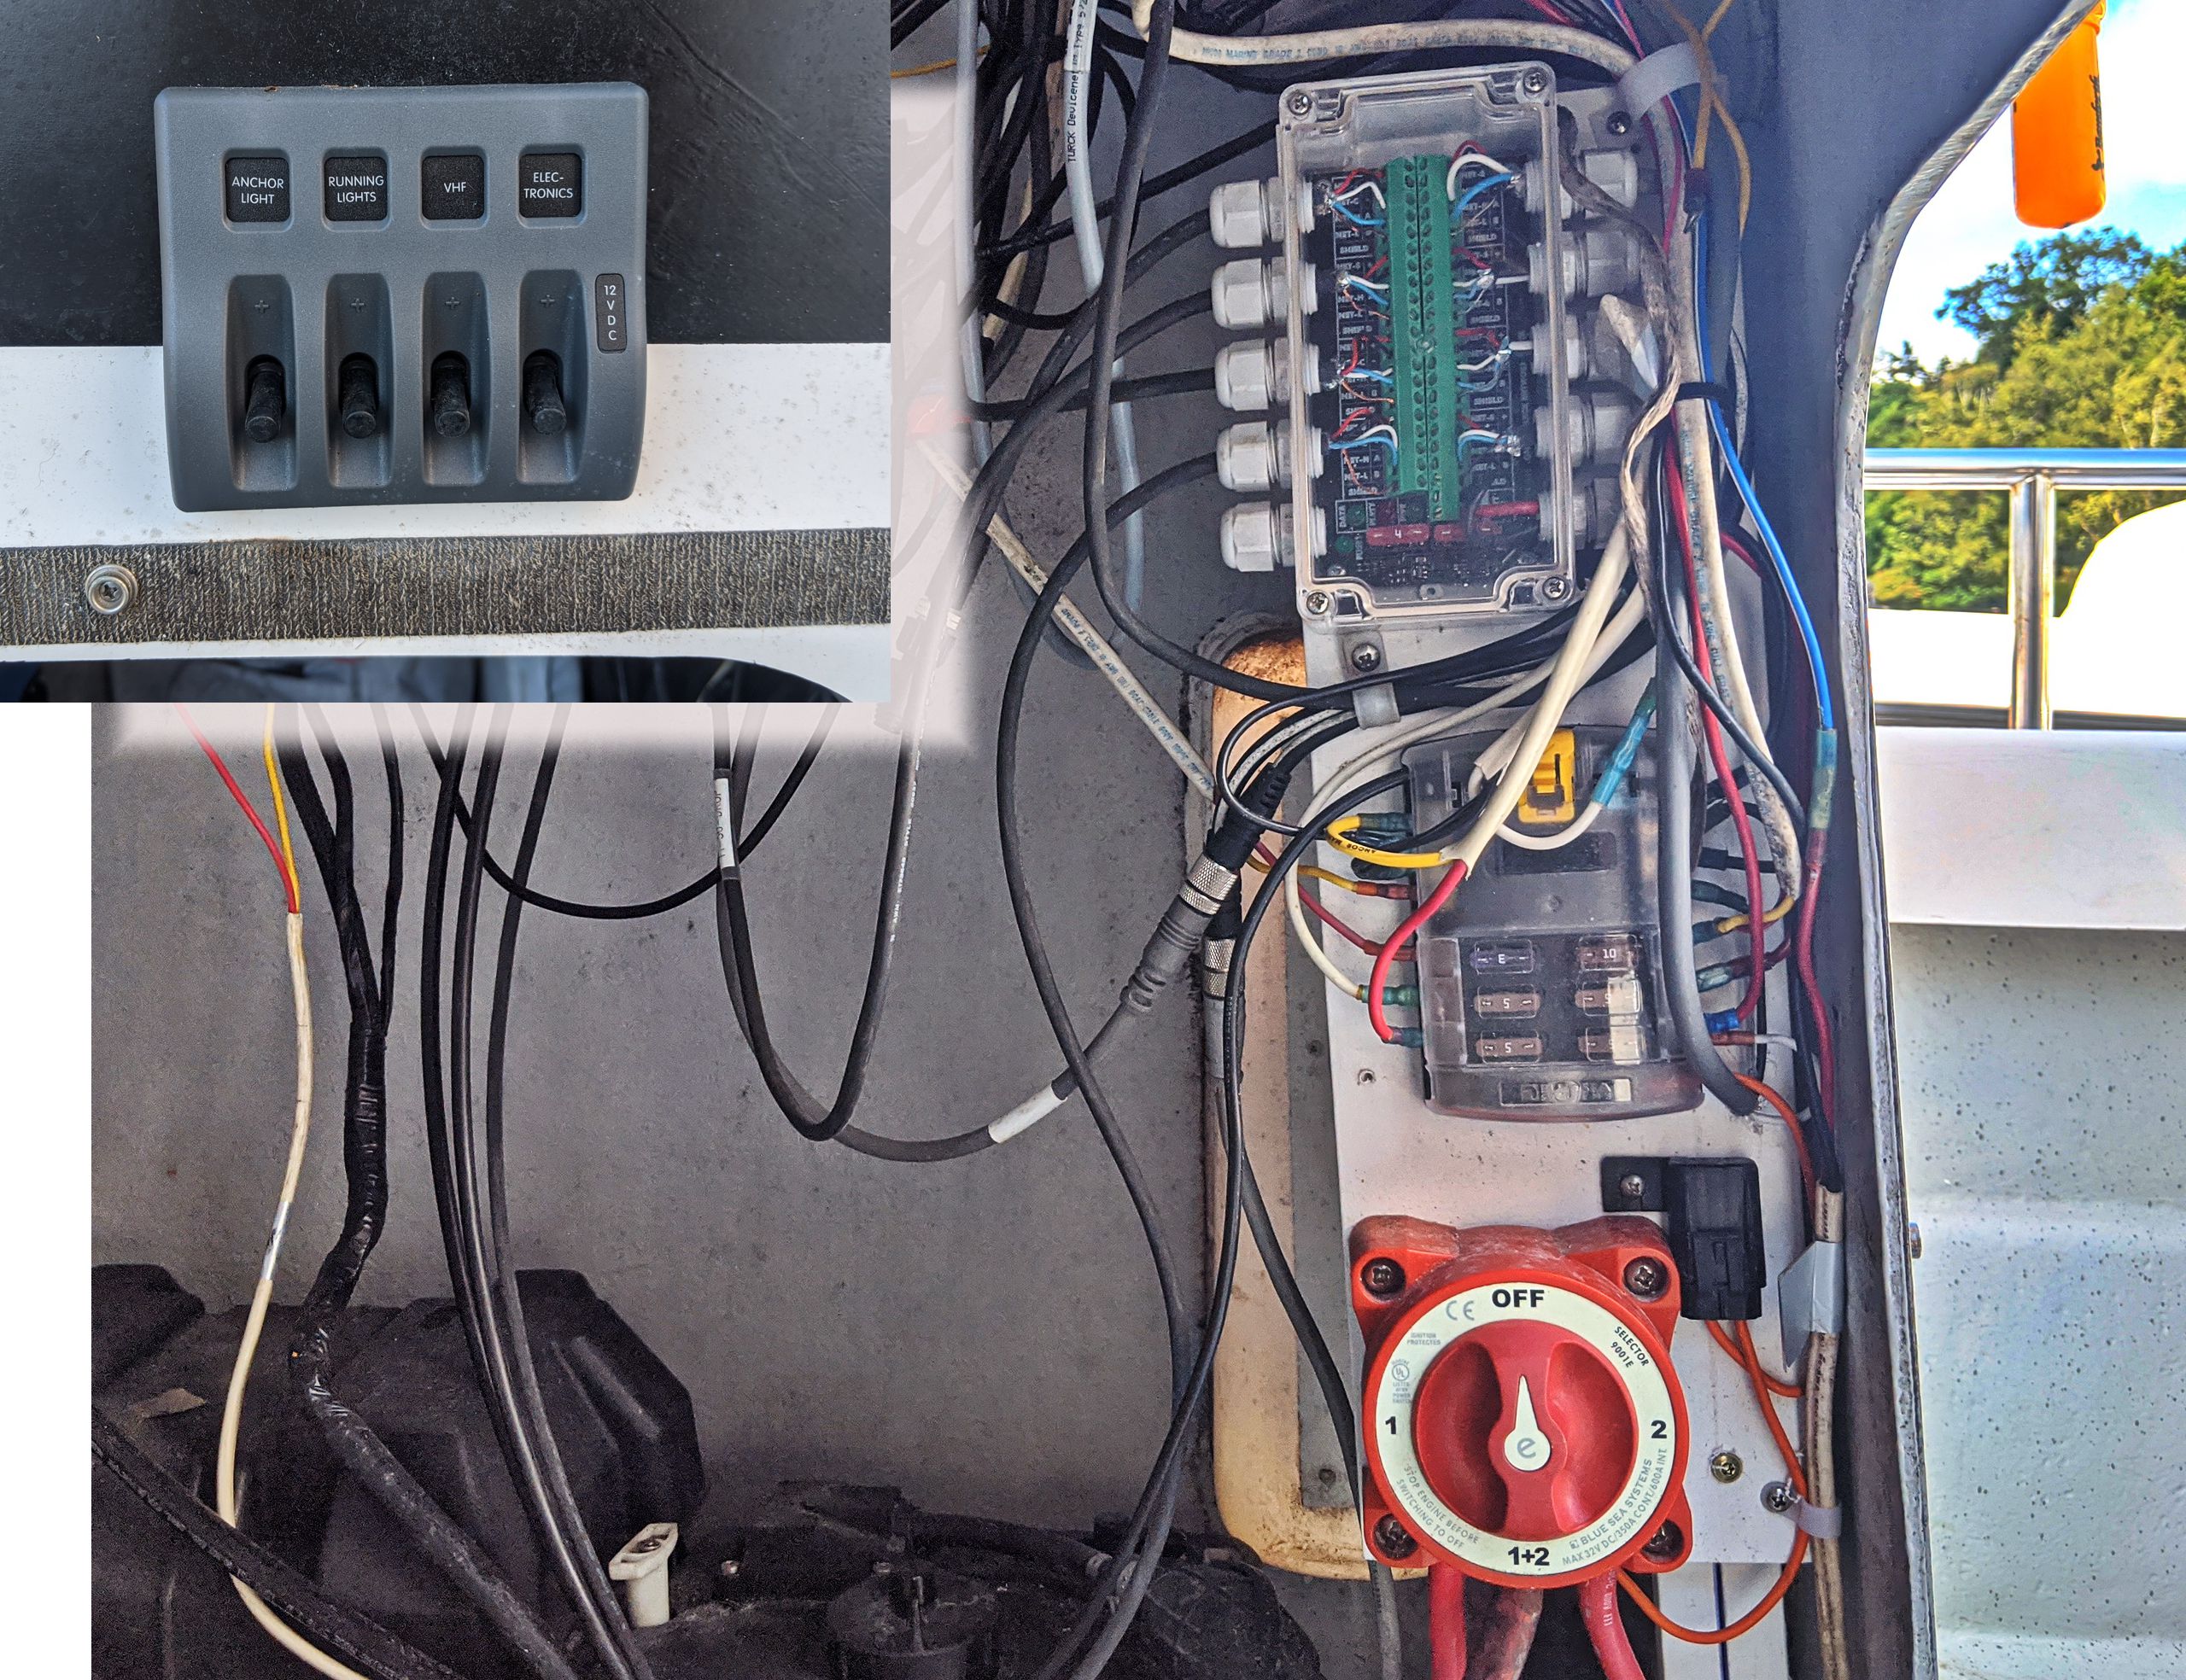
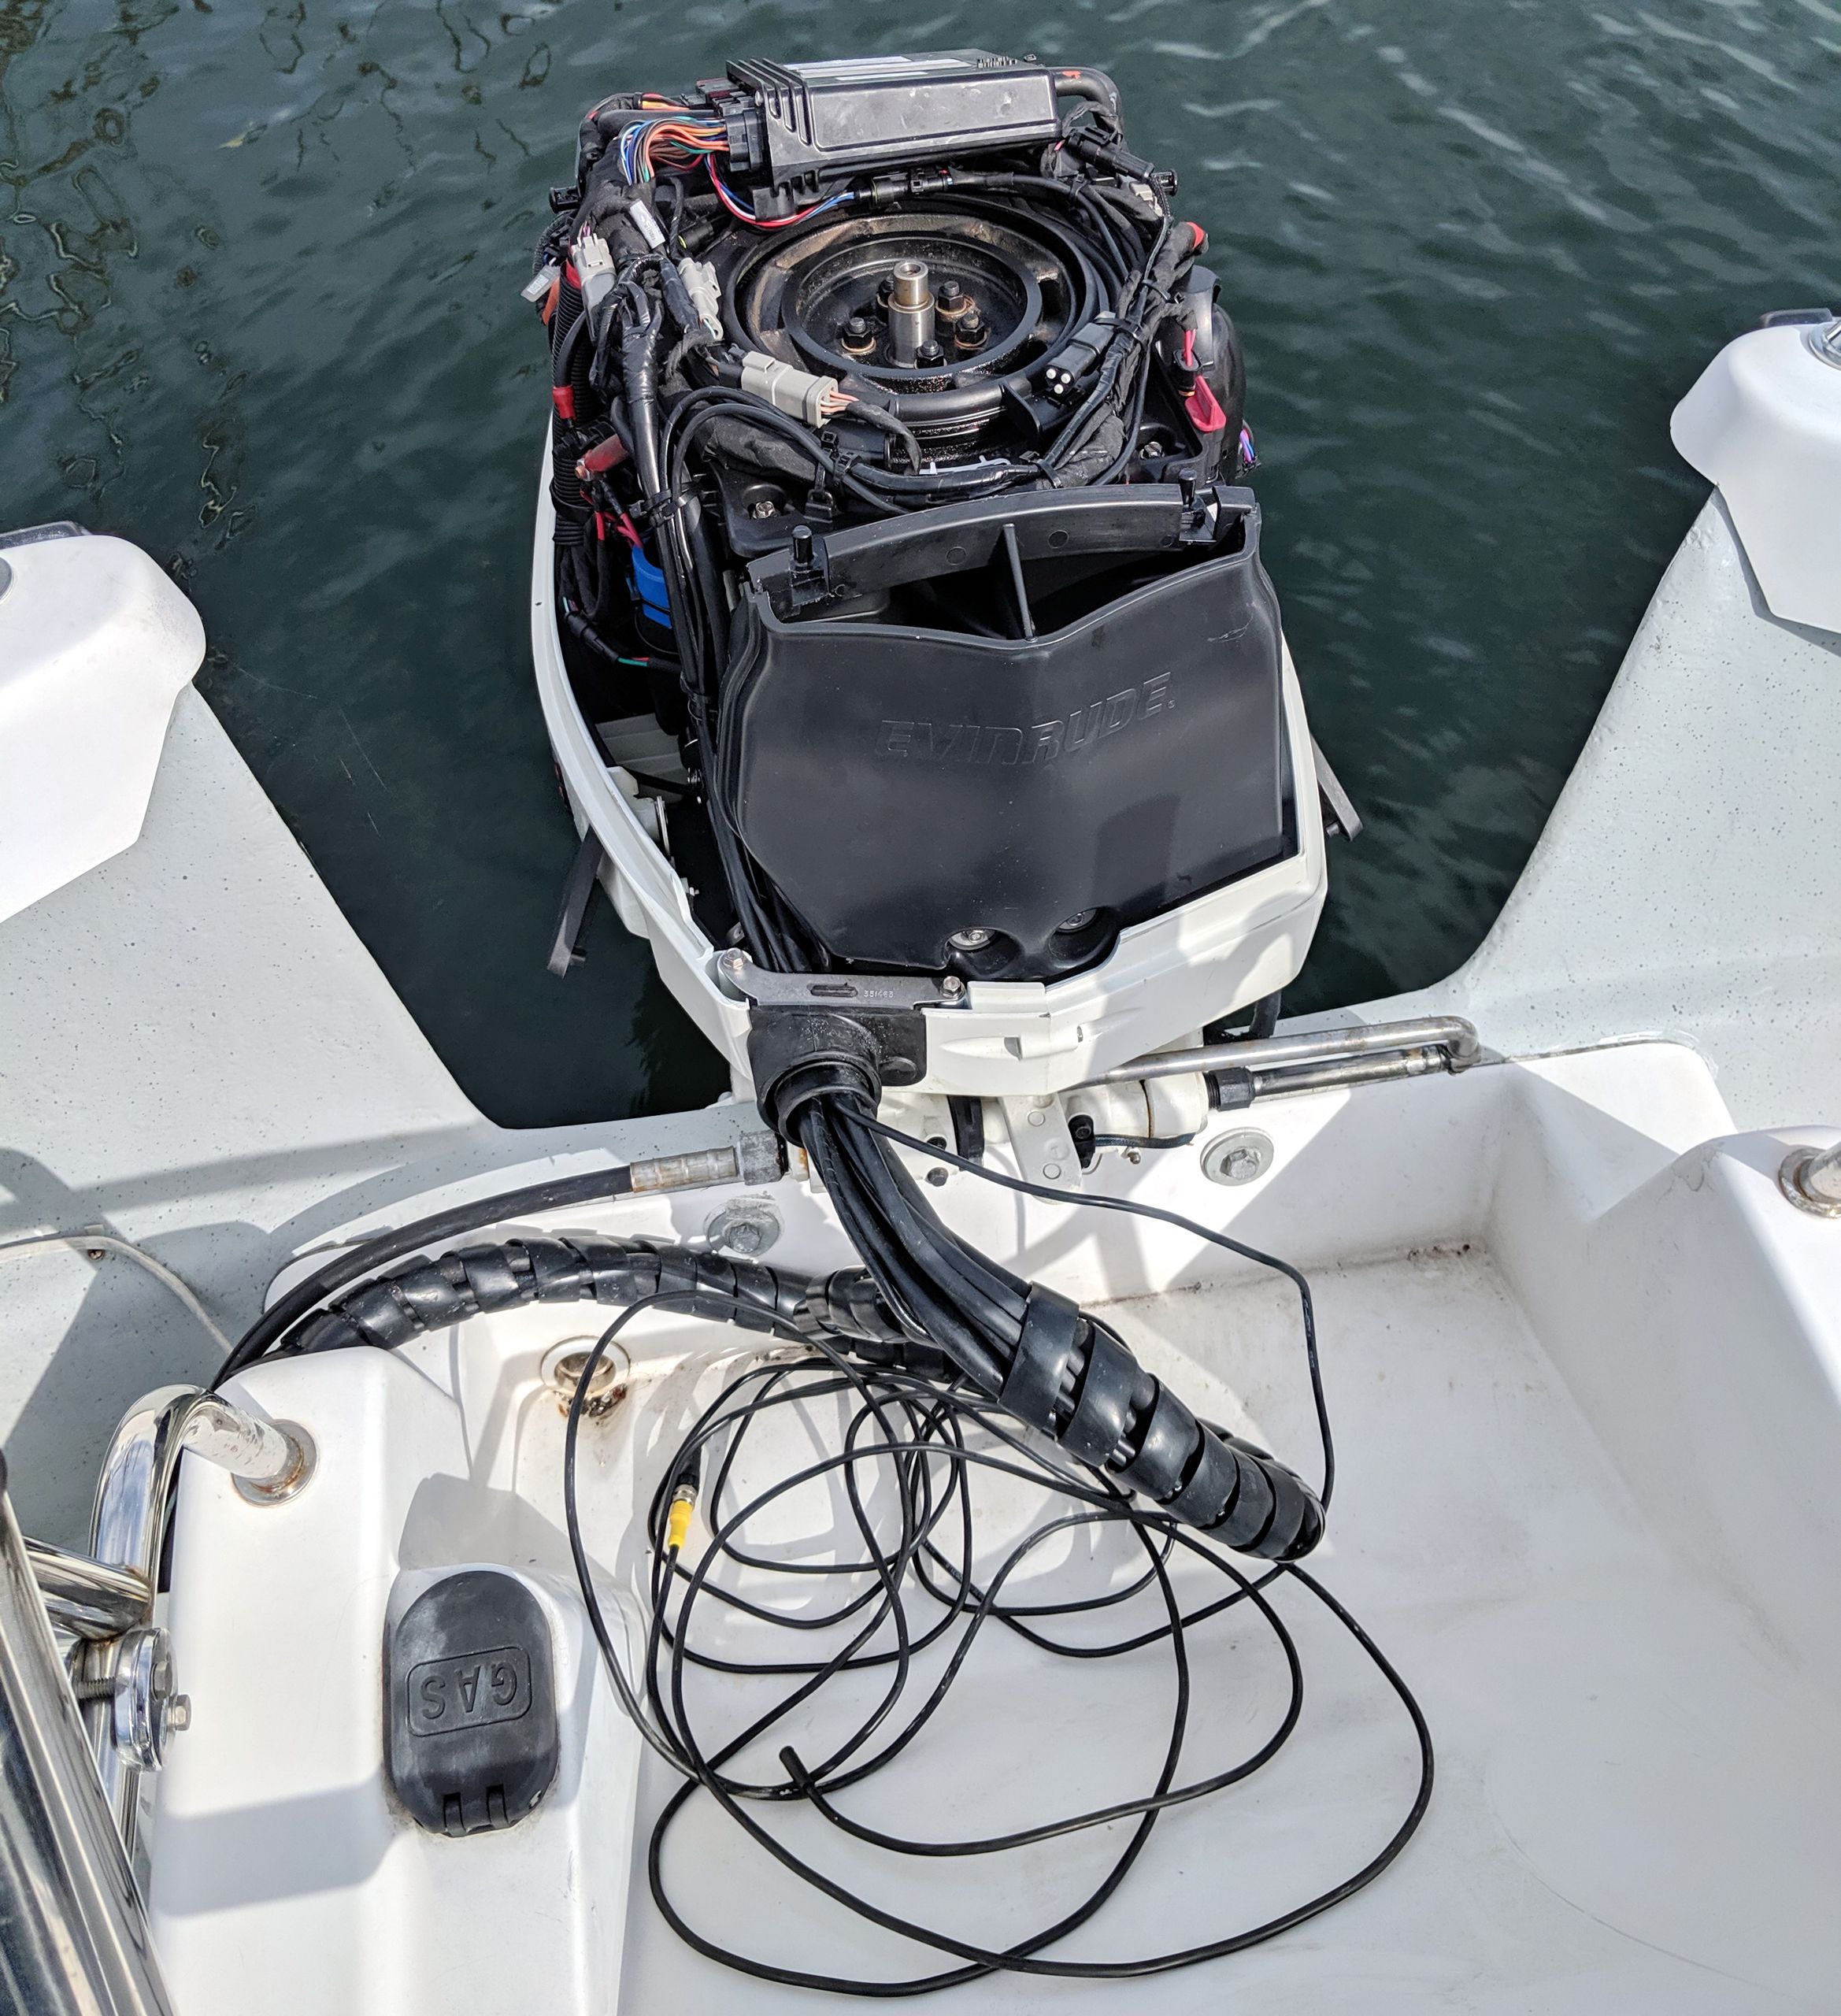
Poor wiring is probably the main reason that electronics fail these days, and there were plenty of potential connection issues on the Maritime 20 after two decades and multiple owners. So while I did reuse the existing battery switch and fuse panel, I took it all apart first and then replaced many wires while adding lots more and also shifting the semi-removable “power panel” 90 degrees inboard for better maintenance and update access. It’s not pretty, I realize, but all those cables are pretty much secured where they need to be. Can we agree on “adequate”?
I also somewhat reluctantly replaced the original (but funkified) Maritime nav light switch panel with a super rugged and blade fused Blue Sea WeatherDeck (inset upper left) and included room for growth (i.e. the two righthand labels should actually read “spare”). And finally, my well seasoned and still kicking Actisense QNB-1 Quick Network Block made sense because it’s suitably rugged for this barely protected location and because I needed to run a bare wire N2K cable for at least one backbone connection.

That connection starts up on what is now the communications shelf, and what’s happening there is a good example of how ergonomics and install limitations can create a puzzle. The limitation is that very skinny molded-in cable run feeding the shelf on center, plus no easy way to expand it. But that wee tube now contains an N2K cable; a 14 ga power feed for VHF, AIS, and the otherwise wireless and wonderful pan and tilt ACR RCL-85 LED searchlight above; plus a smaller cable to switch the all-around anchor/running light. Which took strong string cable pullers, silicone lubricants, and patience.
And while the shelf looks a bit overstuffed in this photo, what you can’t see are the inline blade fuses and 12v Powerpole distribution block; the N2K distribution tees and termination; and the cables associated with the dual antennas and the original but still kicking Airmar PB200 Wind/GPS/Heading sensor mounted on the custom plate above. In other words, the shelf is really stuffed. But nothing up there has failed during lots of use this summer, some of it hard pounding in chop, and behold the clean view I have from the helm.
Why didn’t I mount the AIS’s GPS antenna more seriously? Well, the Si-Tex MDA-5 Class B/SO AIS is still in testing, and proving that SO’s faster update rate really does mean that your fast boat shows up more accurately on the AIS displays of other vessels. Plus its WiFi has been reliably providing GPS and AIS to a variety of nav apps running on an iPad. But a similarly capable AMEC WideLink B600W will soon get the testing spot.
Another critical piece of the ergonomics vs actual-space-available puzzle is that petite but able Standard Horizon GX1400G marine VHF. Its audio is surprisingly good given the size, and very effective up there near my ears, and it has the easily programmed E2O softkey interface I’ve come to appreciate with the big boat GX6000 (though my fingers miss those relatively huge buttons and knobs). The 1400G also has built-in GPS, so I didn’t bother with a NMEA 0183 connection to the AIS or MFD.
And here’s another reason I spent about $180 to replace a perfectly good Icom M504: Mounting the GX on center means that a mate can handle radio chores while the driver keeps their hands on the wheel and their eyes on the road.
Actually, driving Junior is now much easier and safer because I replaced the cable steering with a Dometic Baystar Plus hydraulic steering kit. So the E-TEC, tilted up or down, stays exactly where I put the wheel, and — very, very importantly — shows no desire to turn hard right when the planing boat hits a wave just so (even after I adjusted the trim/torque tab above the prop). At about $870 for the kit and hoses from one of the many Baystar discounters, it was well worth the money and easily the most important improvement I made. (And also much less expensive than Ben Stein’s electric outboard steering, though I sure look forward to when that’s practical on Junior-size boats.)
Installing the Baystar Plus comes with caveats similar to messing with the E-TEC NMEA 2000 cable and gauges. It took some research just to determine how much better the newish Plus model is, for instance, and also before I dared to begin the initial oil feeding. Good outboard shops not only know this stuff inside-out but have nifty bleeding tools.
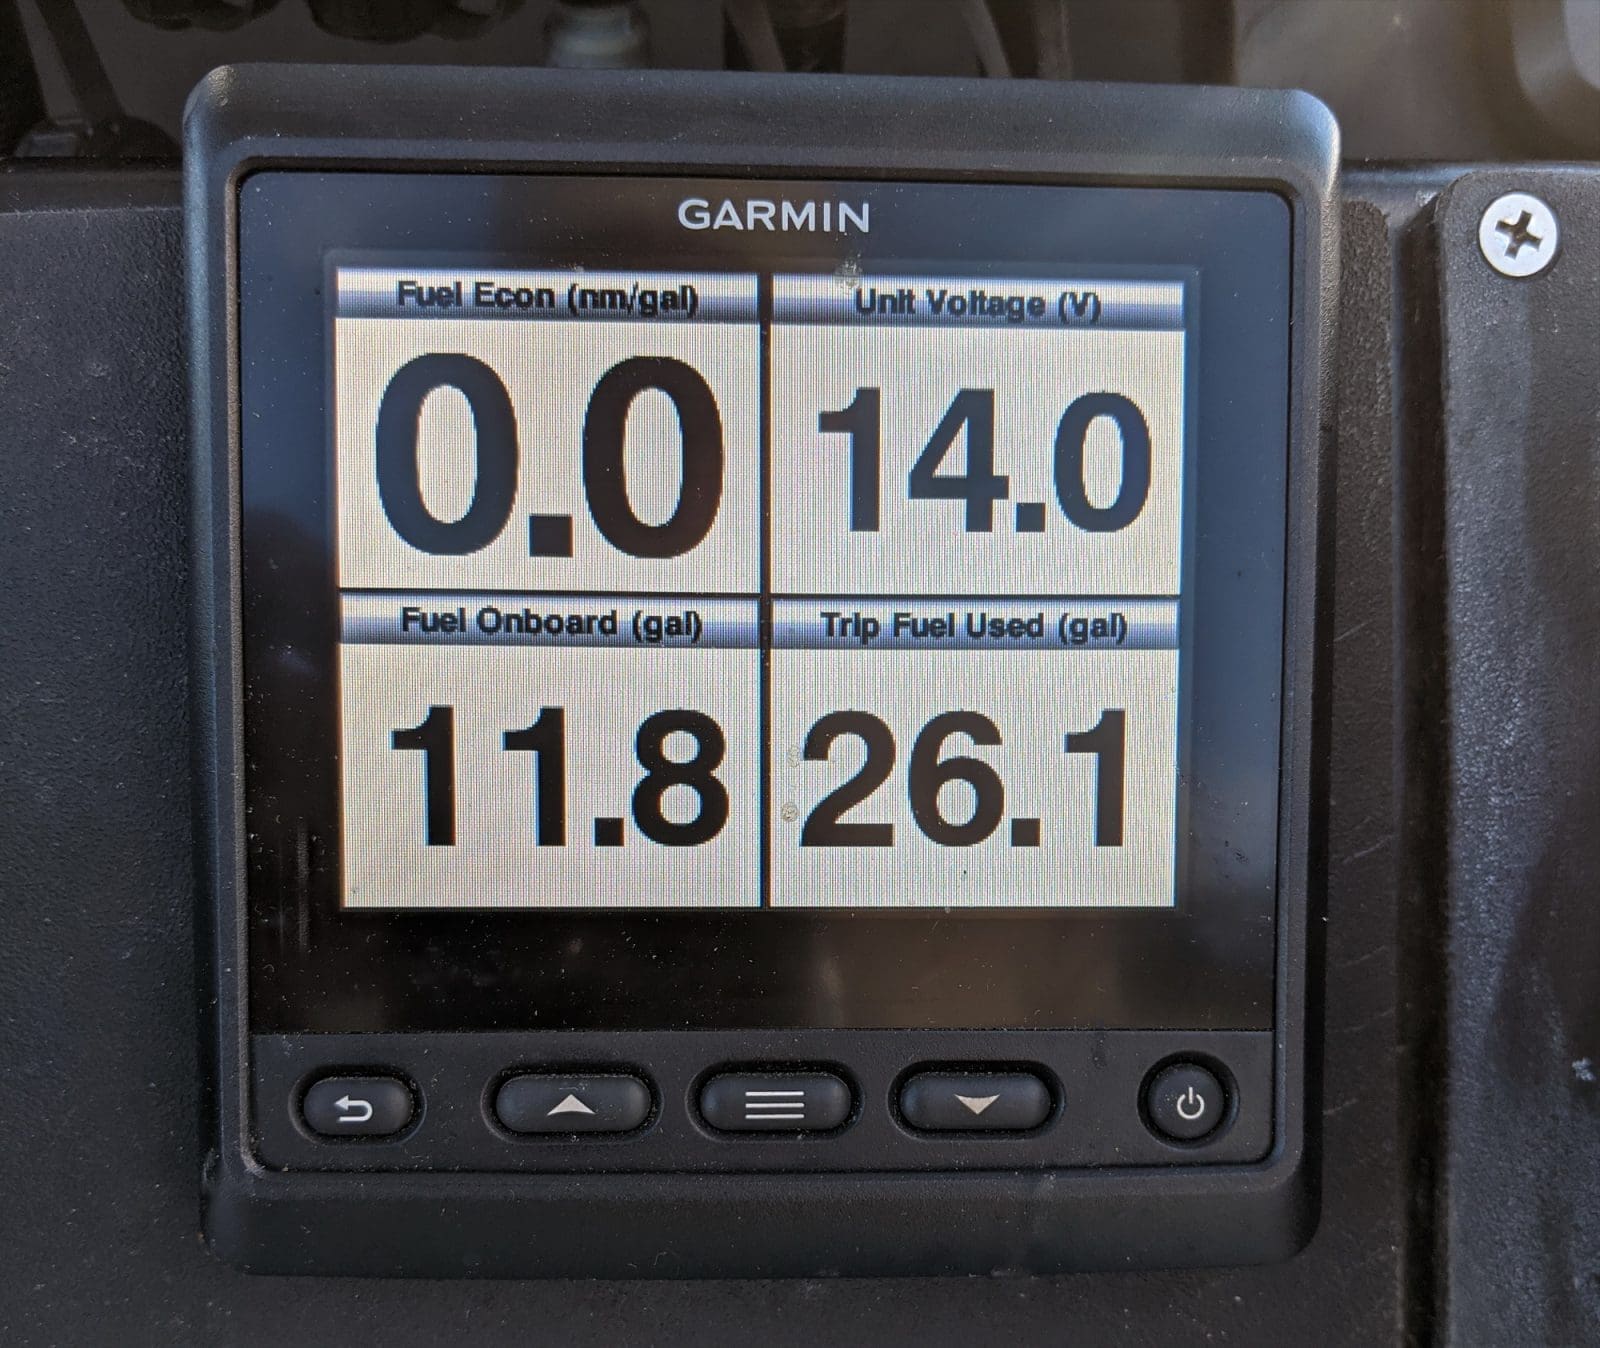
Meanwhile, the Garmin GMI 20 was a last minute and temporary install — my excuse for its slight tilt — and deserves some explaining. Before the redo, the boat had an analog fuel tank sender with a 2-inch gauge, but the newly available fuel flow means that various devices can now calculate tank level by subtracting fuel used. In fact, the fuel flow is so accurate that I see consistent decimal improvements in miles-per-gallon “Fuel Econ” when I adjust the trim properly at a constant planing RPM.
But measuring Fuel Onboard this way is subject to human error. For instance, the 11.8 gallons seen on the Garmin above is reasonably accurate because I remembered to invoke the “Fill the Tank” option behind that screen when I actually filled the tank. But while the Trip Fuel Used can be used in several ways, the 26.1 gallon figure just means that I forgot to reset it at fill up or at the beginning of an actual trip.
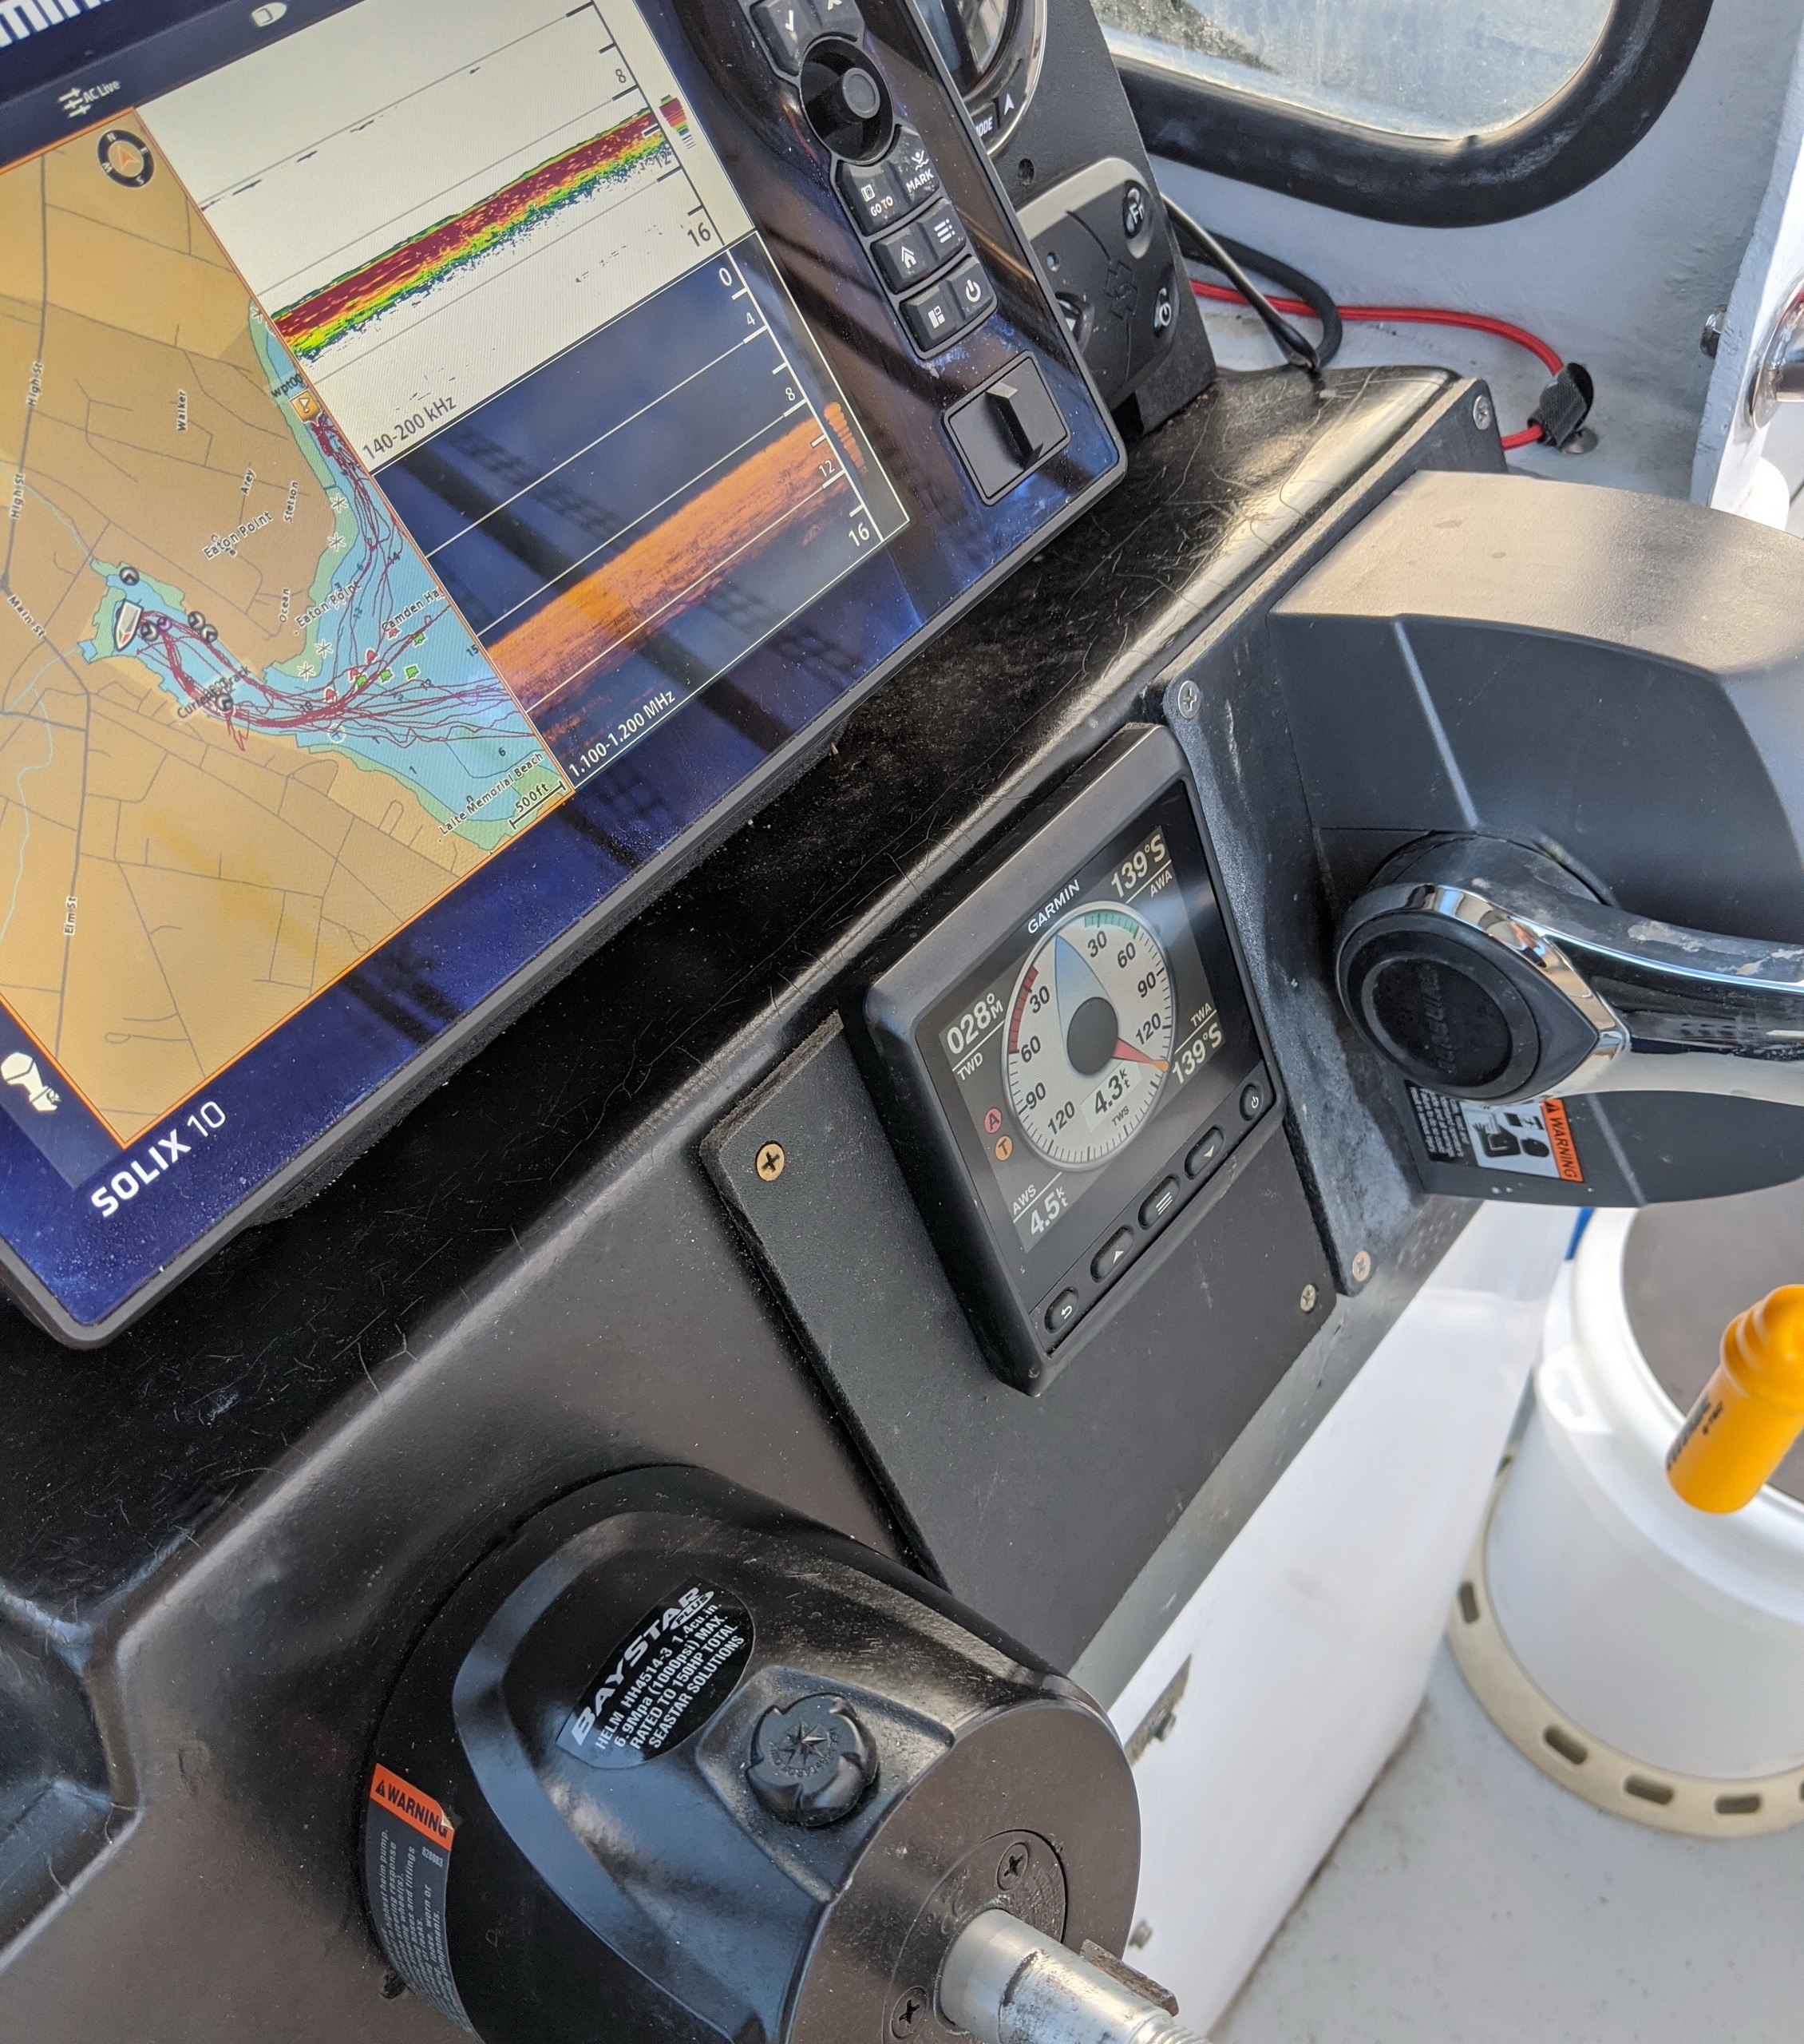
The Icon Pro tach can also display this information, and much more, but I consider that photo of me scowling in its reflection about perfect. Even moved up much closer to my eyes, and given a black background, the little gray scale display is quite hard to read in many lighting situations. Underway I use it almost exclusively for RPM and Trim, and that’s mainly why the GMI 20 is installed until I come up with an alternate plan and finally return it to Garmin (or buy it and install it better).

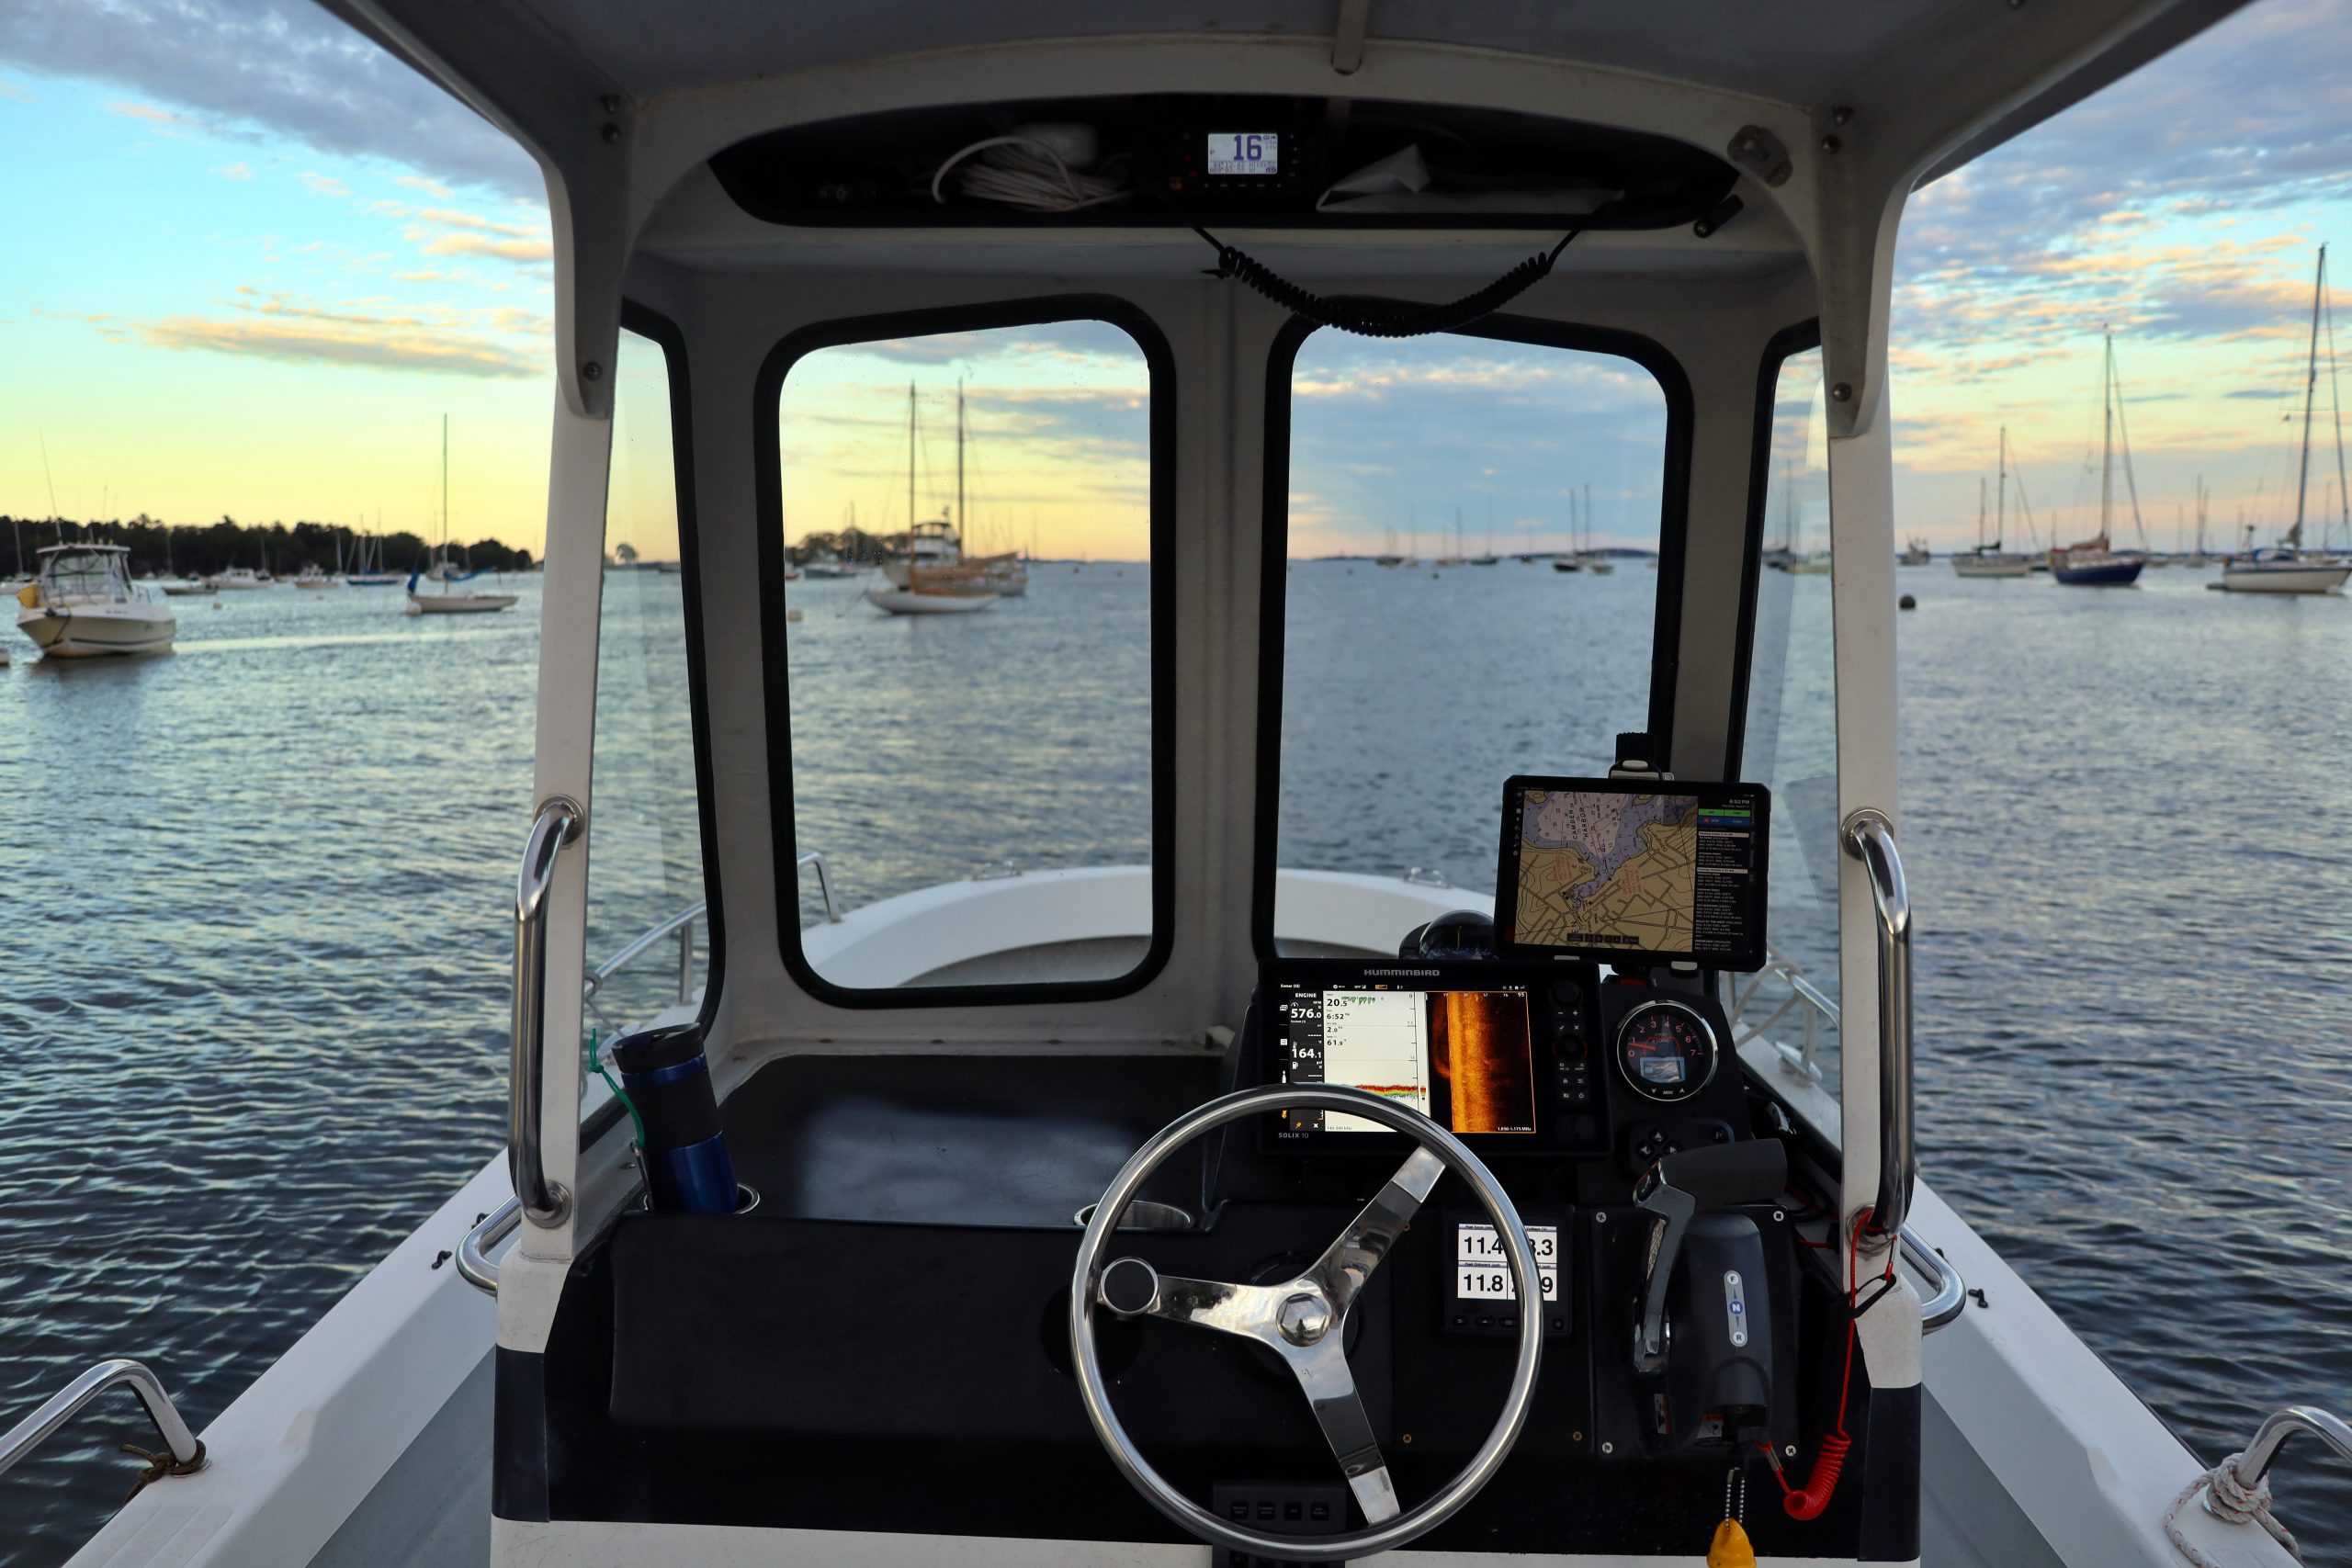
At any rate, here’s a view of the navigation and control area as I often use them, and, yes, the E-TEC is getting about 8.6 nautical miles to the gallons at slow speed ahead. Which will go to about 3.3 at 20 knots if trimmed up a bit, as sort of seen on the Icon Pro. The Humminbird Solix 10 CHIRP MEGA SI+ G2 can also display N2K engine info, and calculate NMPG and fuel remaining, but it too is a loaner and it’s so tempting to use its entire superbright screen for one or more of its amazing sonar functions, particularly Mega resolution side imaging. A full review is in the works.
Note the ScanStrut Rokk Mini Tablet Mount and that while the product is apparently about to change, I’ve long appreciated the original design on Gizmo, didn’t hesitate to take advantage of Defender’s great closeout kit deal, and it’s standing up fine to Junior style abuse (along with the waterproof USB charging port included).
Junior in home slip, almost done? 
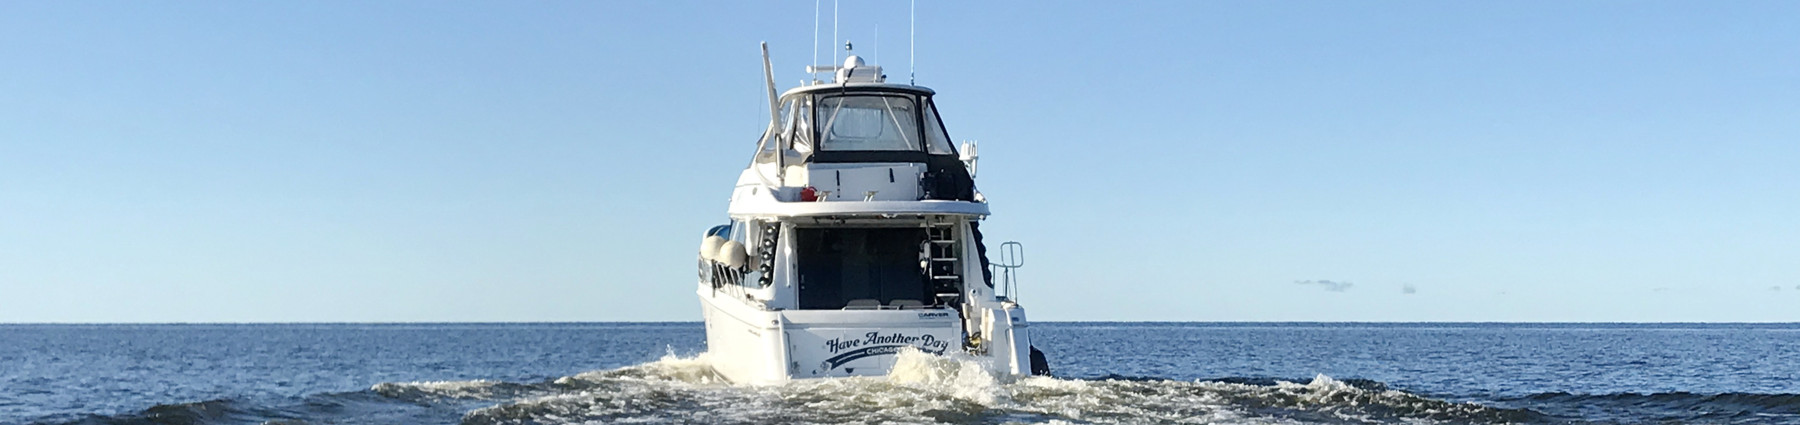
Keeper! (Courtesy Charles Doane)


These days, that abuse includes fishy bait that seems to get everywhere, but it will take something closer to an apocalypse (or deep cold) to stop me from lobstering now that I’ve learned how engaging and fruitful it can be, even on a very small recreational scale. Actually, Junior has been a blast in many ways this summer, and there’s no doubt that getting the electronics and controls pretty close to my ergonomic ideal is a significant reason why.
Which is not to say that I’m done with Junior’s systems. That’s another enjoyable aspect of boat ownership, as far as I’m concerned. And I’m also happy to further detail any of the specific projects described above, either in the comments below, or another entry if there’s enough interest.


Great article
Hey Ben – looks great. I’m curious though – the photo of the Garmin 742 engine display, includes a gauge that reads “55.5 V”.
Really? Perhaps alternator output, 55 Amps? Not sure what it’s displaying, there….
That’s for real alternator output voltage, Grant. For one thing, I’ve seen it on other N2K displays, like the Solix 10, but Jim Hebert has the goods:
“The primary voltage of the E-TEC power generation by its alternator is 55-Volts. The 55-Volt bus runs most of the engine high-current consumption devices. The 55-Volt bus is then regulated down to 12-Volts to provide power for the engine 12-Volt devices and to provide power to external 12-Volt loads. The voltage conversion is accomplished with pulse-width modulation techniques and is very efficient, so …”
http://continuouswave.com/forum/viewtopic.php?t=321
Also, while I don’t have real battery monitoring on Junior, it’s quite useful that Garmin and many other N2K displays can show DC voltage at the unit. So I have it on that main GMI 20 screen along with fuel info, and thus can see battery voltage pretty well when I activate one, or the other, and then how the E-TEC is charging once it’s started. (Also nice to have a dual battery system, which it came with.)
Ok, got it, cool. Shows how much I know about outboards!
Voltage on MFD’s:
When our Yanmar engine is running, the Maretron EMS100 sends 12V engine alternator voltage, together with a bunch of other data, to our B&G Zeus chartplotters via N2K. Sweet. However, when the engine is not running, the Maretron does not transmit, so there is no starting battery data to populate anything.
Our installers at first connected the Zeus chartplotters to the 12V power supply and were able to display voltage… but this was the stupidest voltage display ever! Our boat’s electrics are 24V, so the display was the 12V output of a Victron DC-DC converter, which is constant (of course). Useless.
So I had them re-wire the chartplotters to 24V. So we get a nice supplemental readout in the cockpit of what’s up with battery charge, which is nicely displayed in a corner in pretty much all our configured screens. Of course for more detail one can always go to the nav station downstairs and look up all sorts of battery data on the Mastervolt EasyView5.